Stream Cloud VPN Setup for Meraki MX
Stream Cloud allows you to process a video stream in the cloud with minimal hardware setup. Ensure your camera supports RTSP:
- RTSP is only supported on second generation cameras (MV2/MV12/MV22/MV32/MV52/MV72 cameras only). It is not supported on the MV21 and MV71.
- RTSP is only available on MV 4.2 firmware and newer. Refer to Managing Firmware Upgrades for steps on doing this firmware upgrade for your MX.
MX Public IP
-
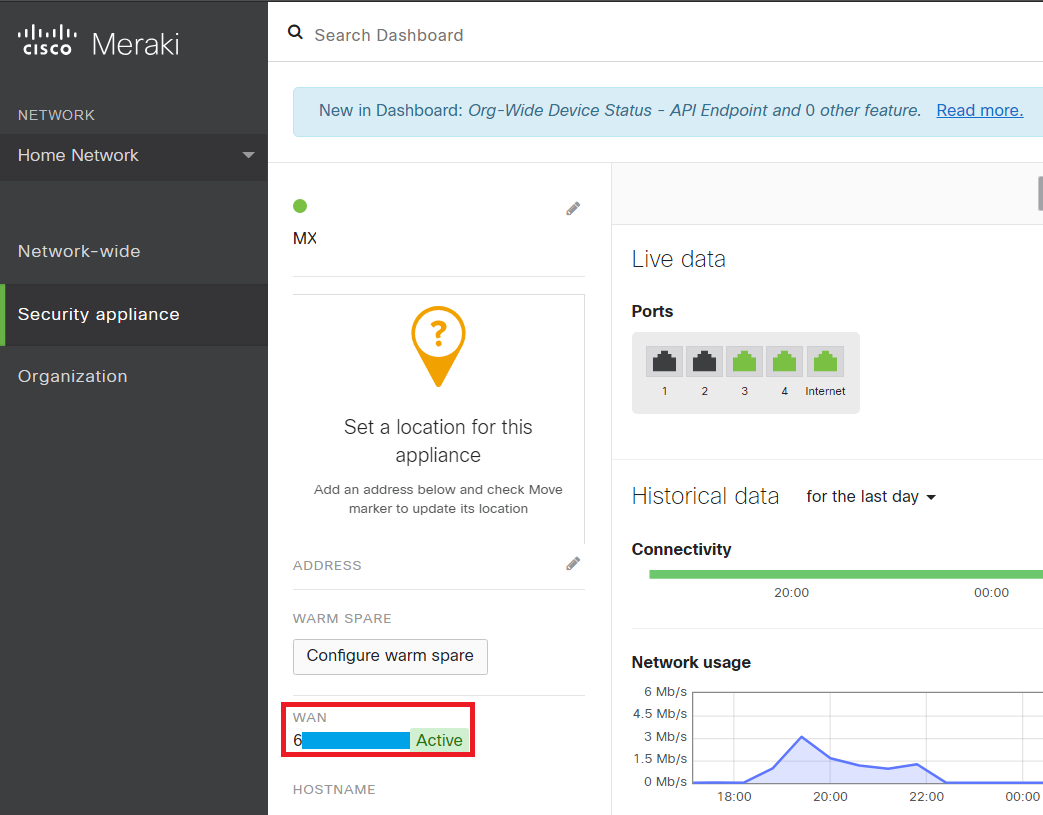
To find your Meraki device's IP address, open the Meraki dashboard and select ‘Security appliance’ -> ‘Appliance Status’.

-
In the case below, the number hidden with the blue box is the public IP of the MX.
Camera VLAN CIDR block
Create a VLAN for just the cameras you want to share with Plate Recognizer so that the rest of your network is isolated. Sharing an existing VLAN and using Firewall rules is not recommended because the MX cannot block VPN traffic initiated by non-Meraki peers.
-
Choose a preferred CIDR block that doesn’t overlap with blocks already assigned to other users. The CIDR block must contain at least 4 IPs (/30 or larger), 2 IPs in the block are reserved for the network and broadcast addresses. Use this free tool to help generate a CIDR block. Examples:
- The CIDR block 192.168.1.0/30 has 4 IPs, Fit up to 2 cameras.
- The CIDR block 192.168.1.0/29 has 8 IPs, Fit up to 6 cameras.
- The CIDR block 192.168.1.0/28 has 16 IPs, Fit up to 14 cameras.
-
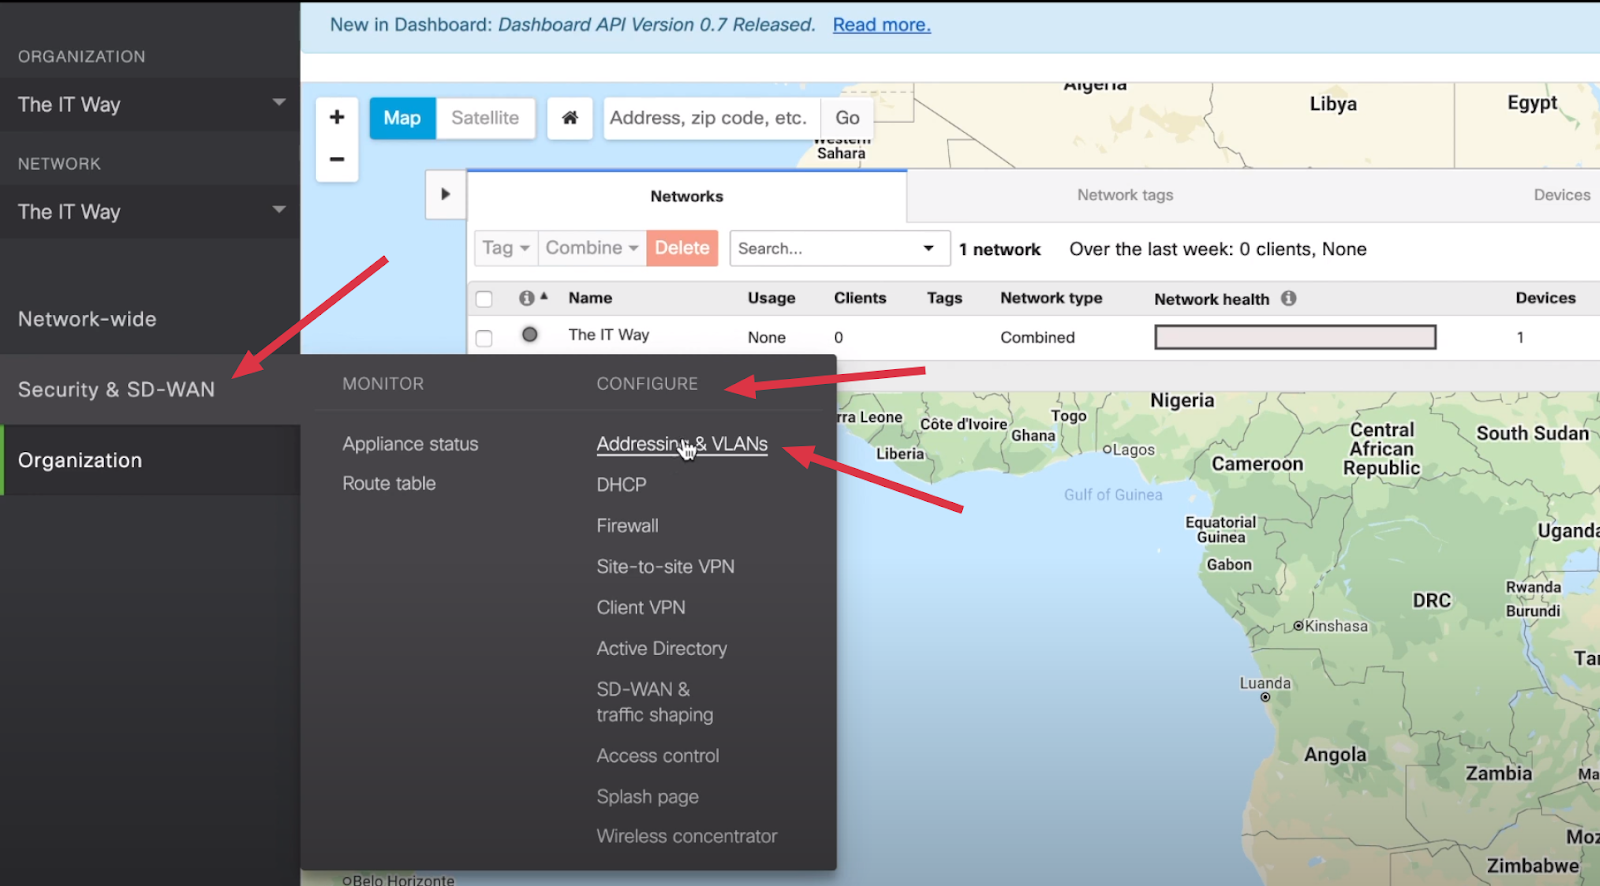
Create VLAN by going to Security & SD-WAN > Configure > Addressing & VLANs
-
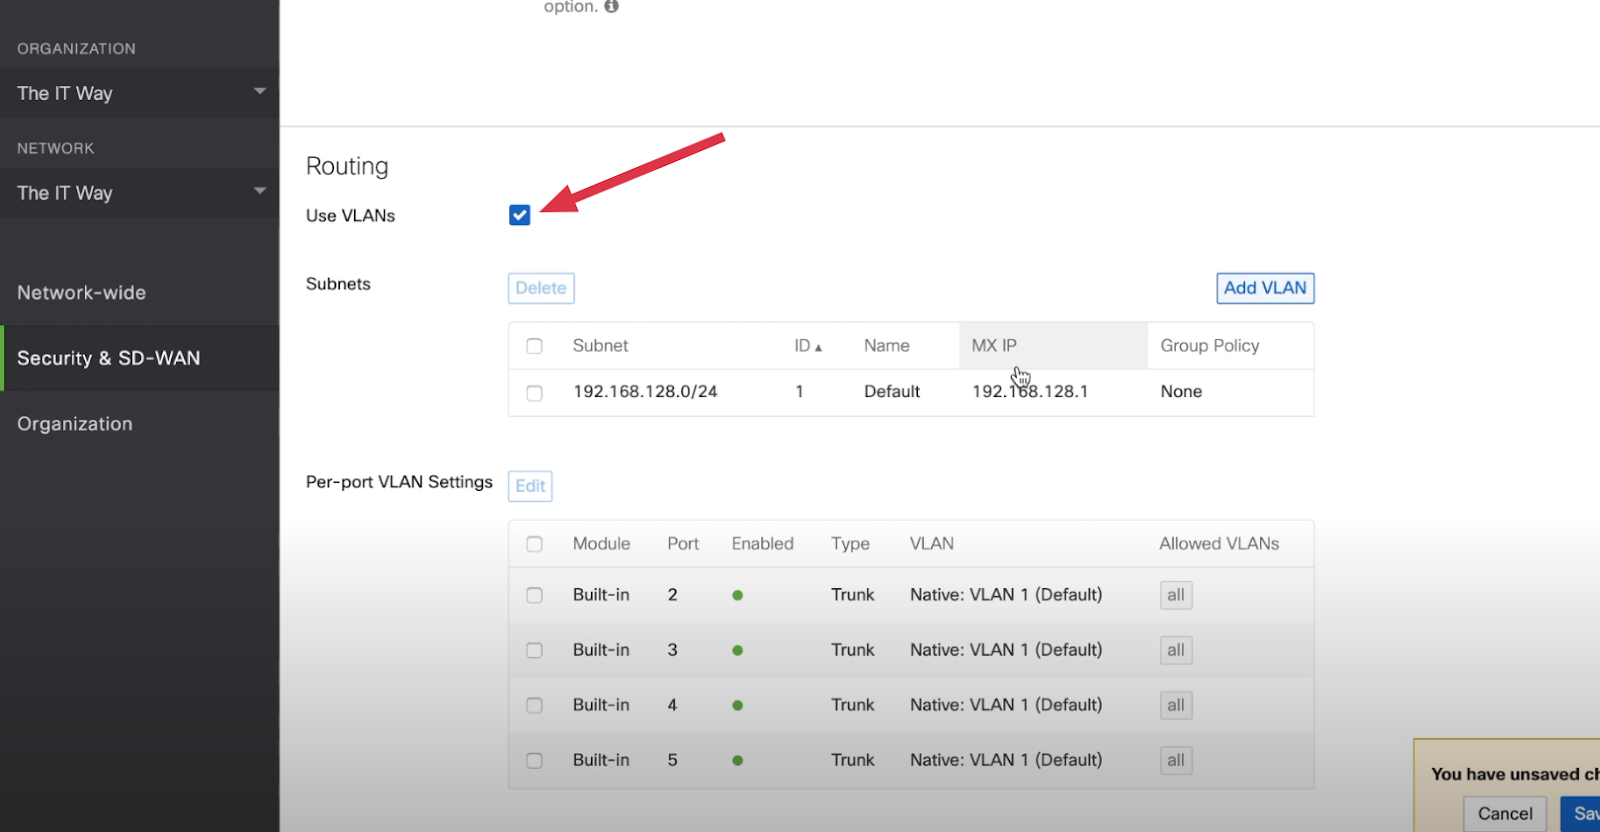
By default, VLANs are disabled, Click the checkbox Use VLANs to enable. Add additional VLANs by clicking Add VLAN at the top right of the Subnets table.
 Info required when adding a VLAN:
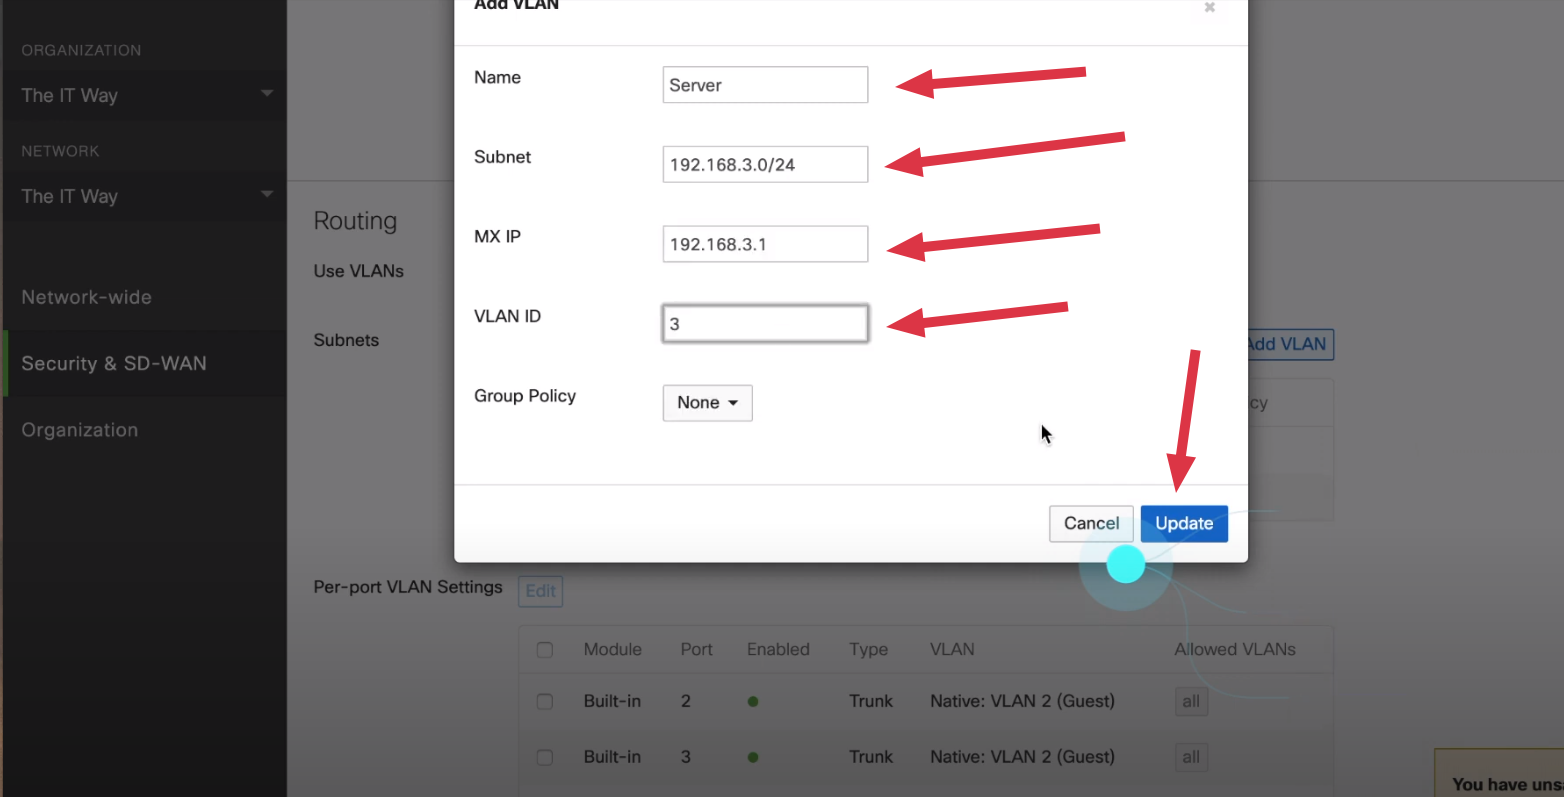
- Name: The name of the VLAN.
- Subnet: The selected CIDR block for the VLAN.
- MX IP: Default gateway IP address. (If the subnet is 192.168.3.0/24, MX IP is 192.168.3.1).
- VLAN ID: A unique numerical identifier assigned to the VLAN.
- Group Policy: The group policy you wish to apply to this VLAN, If any.
-
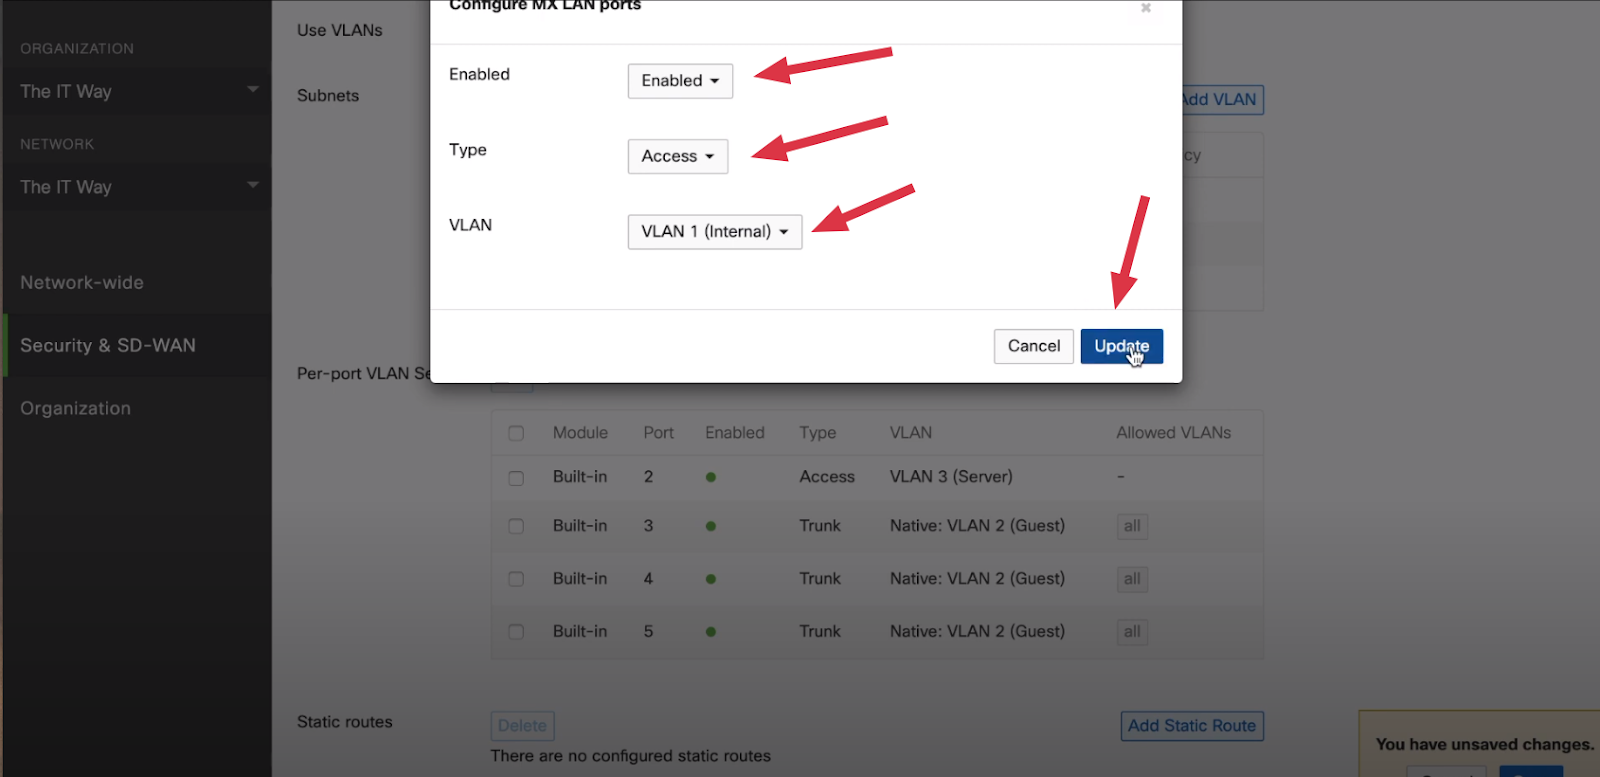
Save changes then scroll to the Per-Port VLAN Settings section. Click on a port for each camera then configure below fields:
- Enabled: Select Enable.
- Type: Set the port to access mode.
- VLAN: Select the VLAN for the cameras.
Share the CIDR block for the VLAN and the MX public IP then Plate Recognizer will share back the following configurations required in the next steps:
- Peer Name
- Peer Public IP
- Peer Pre-Shared secret
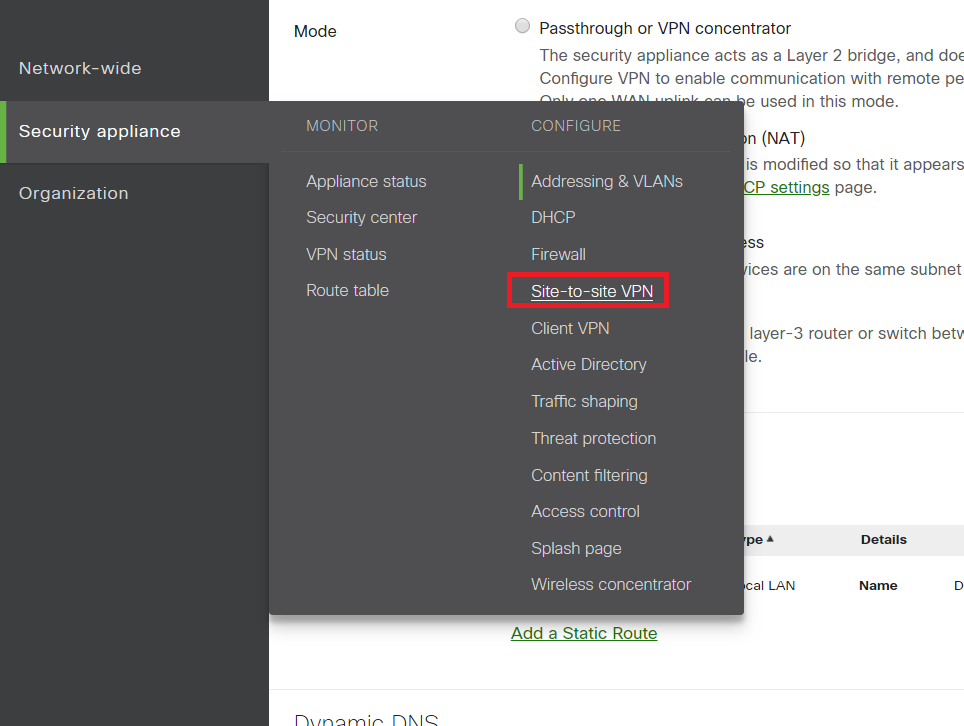
Add Plate Recognizer VPN Peer
-
In your Meraki Dashboard navigate to site-to-site VPN options under ‘Security appliance’->’Site-to-site VPN’.
-
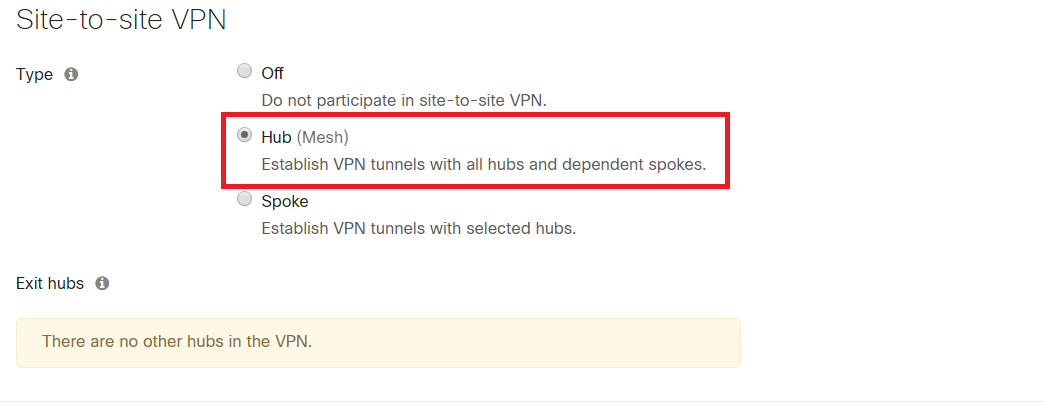
Under ‘type’, select ‘Hub (Mesh)’
-
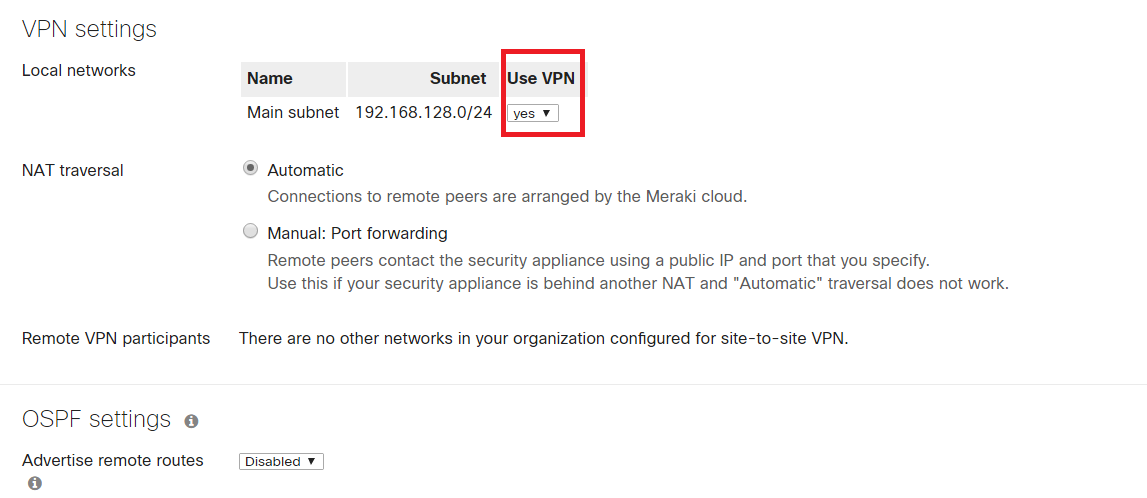
Under the ‘VPN settings’ sub-header find the VLAN that you’d like to enable the site-to-site routing for and select ‘yes’ under the ‘Use VPN’ column.
-
Leave NAT traversal as automatic.
-
Leave OSPF advertisements disabled.
-
Scroll down to Organization-wide settings > Non-Meraki VPN peers
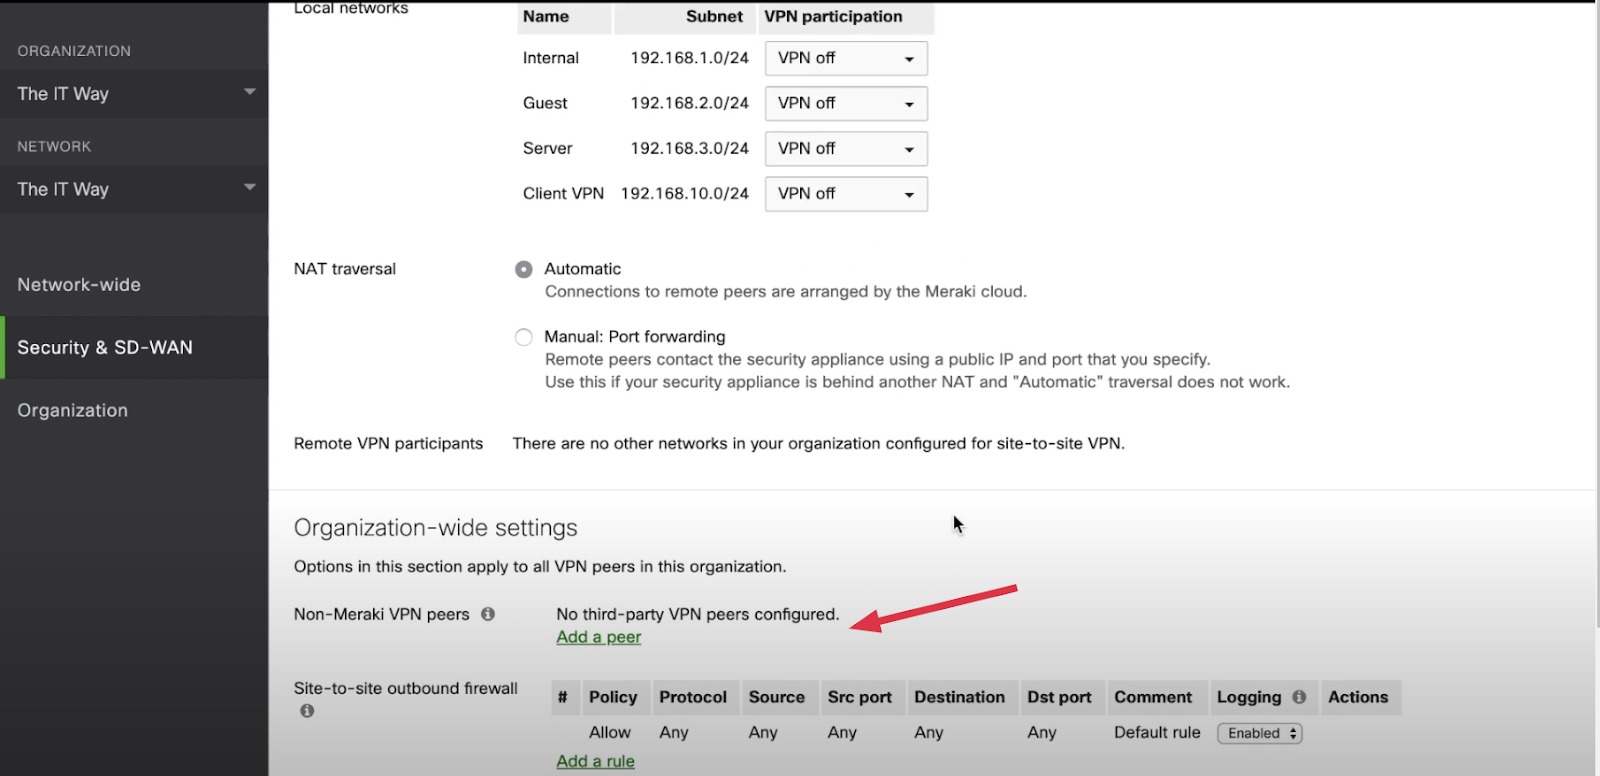
-
Click on Add a Peer then fill out the information as described below:
- Name: Peer Name provided by Plate Recognizer
- Public IP: Peer Public IP provided by Plate Recognizer
- Private subnets: 172.31.2.0/24
- IPSec policies: Click “Default”, select “AWS” under the Preset menu and "Update"
- Pre-shared secret: Peer Pre-Shared secret provided by Plate Recognizer
- Availability: All networks

-
To bring up the VPN tunnel, interesting traffic should be initiated from a host behind Cisco Meraki. Try a PING to 172.31.2.241 from the VLAN on the MX. A successful ping means the tunnel is set up correctly.
Enable External RTSP
After completing the configuration, enable RTSP per-camera then share the IP address for each camera with Plate Recognizer.
- Select Cameras > Monitor > Cameras and select a camera from the list.
- Select Settings > Video Settings.
- Under External RTSP select Yes
