Azure Web Services
Azure Container Instances (ACI)
Azure Container Instances is a service in Azure that allows you to run Docker containers quickly and easily without managing the underlying infrastructure. With Azure Container Instances, you can run containers on demand and only pay for the duration of their execution. The service supports both Linux and Windows containers and integrates with other Azure services such as Azure Virtual Network, Azure Files, and Azure Monitor. You can deploy and manage your containers using the Azure portal, Azure CLI, Azure PowerShell, or through the Azure Container Instances REST API.
Setup instructions:
-
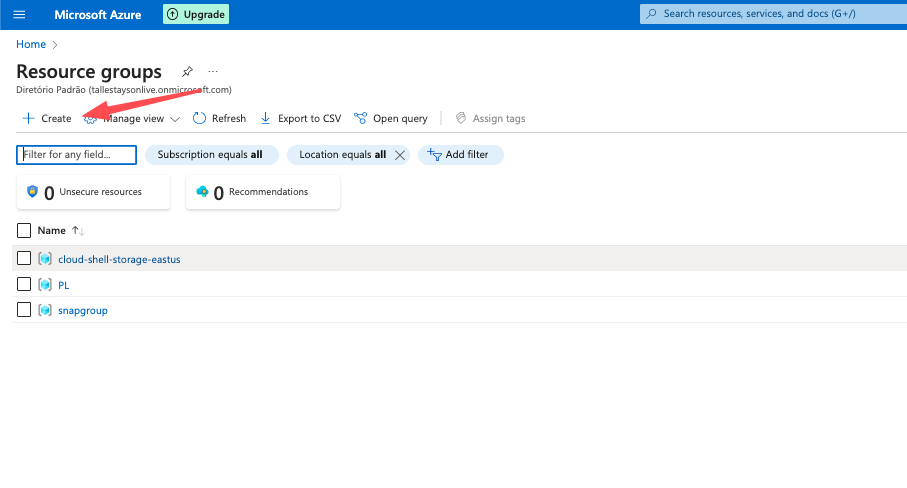
After logging into your Azure account, you must create a resource group that will be linked to this deployment, if you want to use an existing resource group this step can be skipped.
-
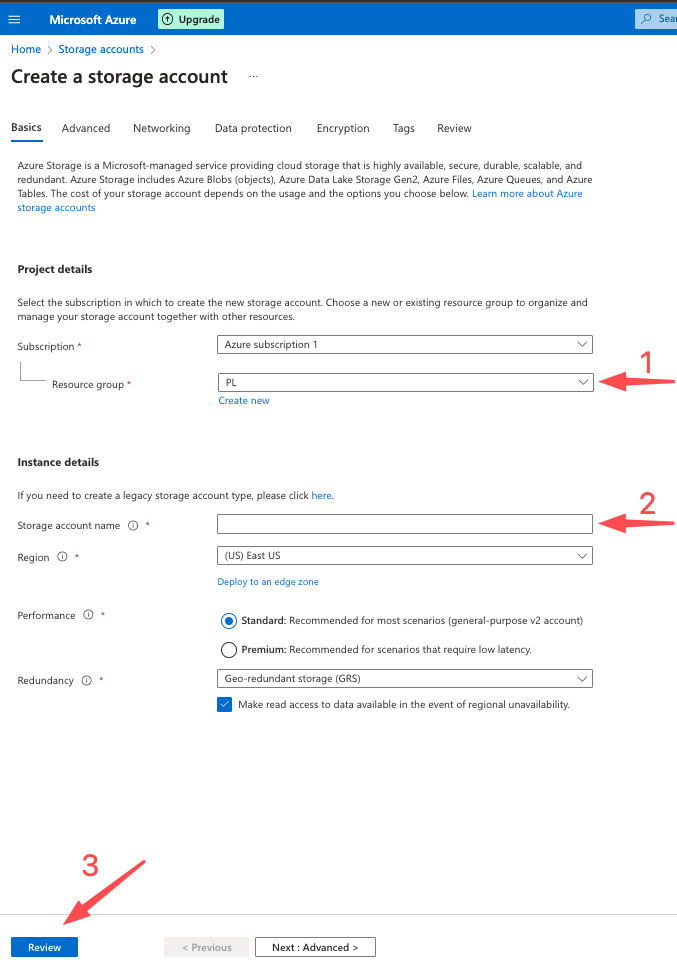
In this step you will provide a storage account so you can create a share file that will be linked to the container volume. In the item 1 of the image, you must inform the resource group created in the previous step.
-
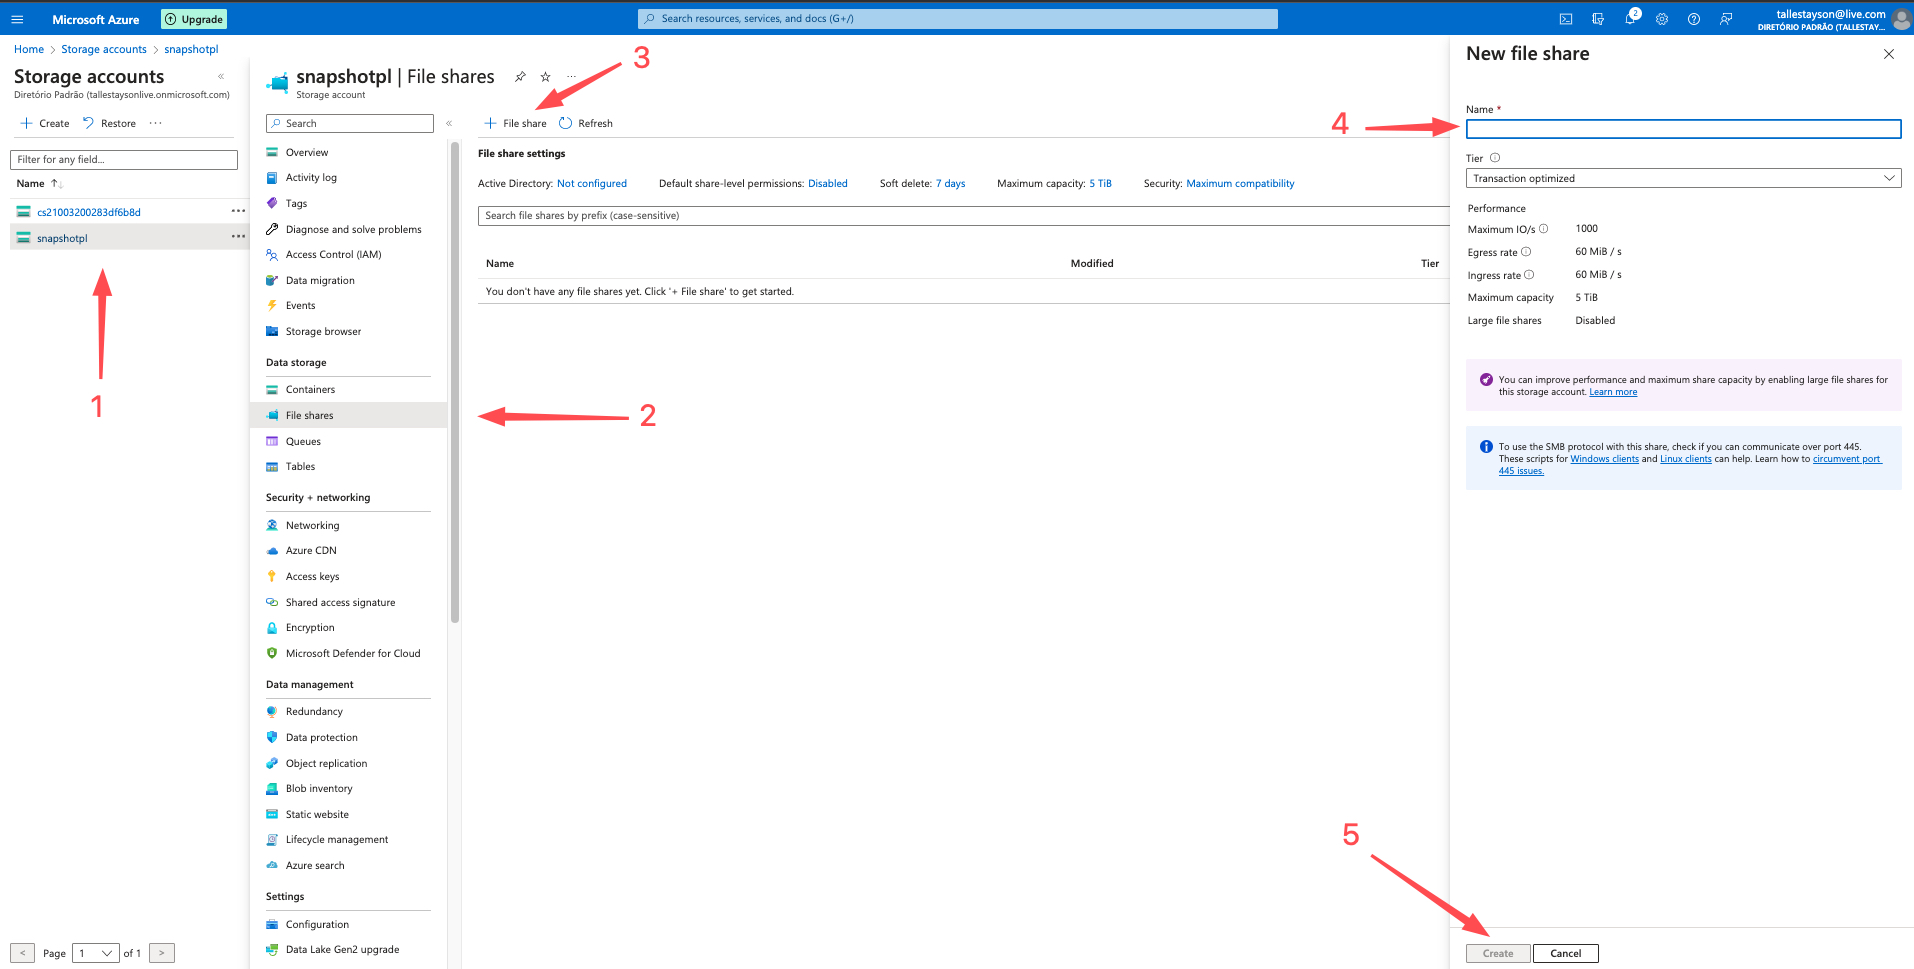
You must share a file to work as a volume, by default the file must have the name "license", the name must be placed in item 4 of the image below.
-
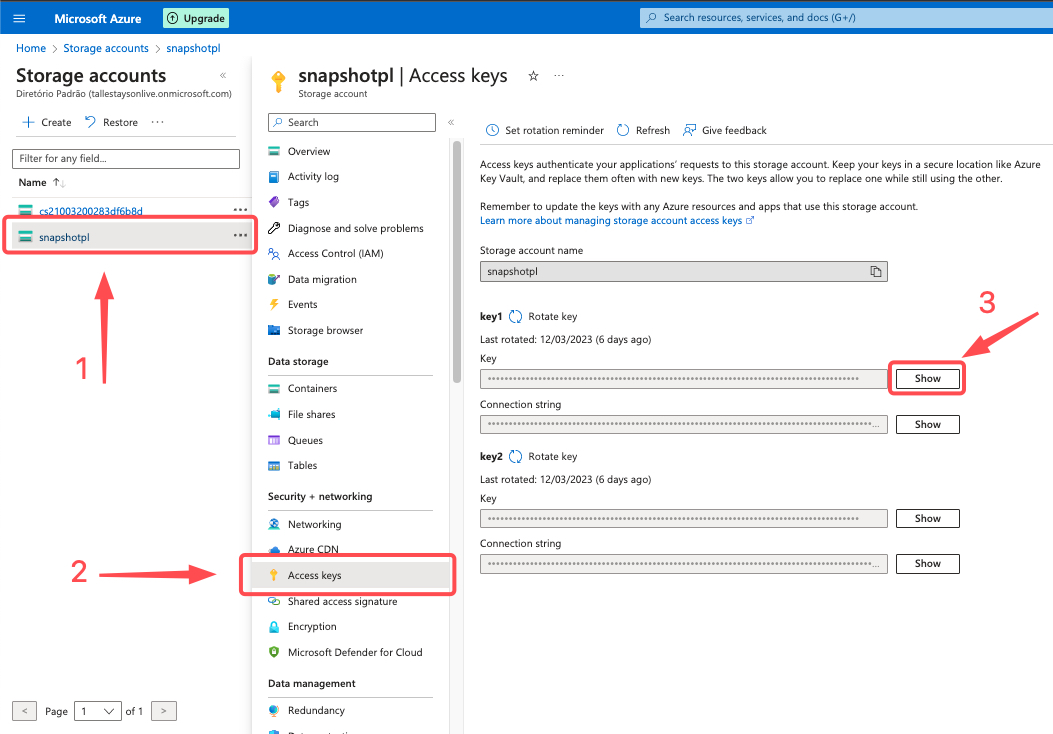
Still in the Storage account settings, copy the account access key to add to the container creation command by following the steps below.
-
In this step you must substitute the obtained value and replace it in the command for creating your container instance, note that the TOKEN and the LICENSE_KEY are parameters that can be obtained here. The values of CONTAINER_NAME and DNS_NAME you must define as you need them.
Docker Hub Account RequirementDue to rate limitations from Docker Hub, anonymous users are restricted to a limited number of pulls for public images. It is necessary to create an account for increased access. You can sign up here. Add your credentials in the
--registry-usernameand--registry-passwordparameters when creating your container.az container create --resource-group RESOURCE_GROUP \
--name snapshot \
--image platerecognizer/alpr \
--azure-file-volume-account-name CONTAINER_NAME \
--azure-file-volume-account-key KEY_STORAGE_ACCOUNT \
--azure-file-volume-share-name license \
--azure-file-volume-mount-path license \
--environment-variables "TOKEN=YOU_TOKEN" "LICENSE_KEY=YOUR_LICENSE_KEY" \
--ports 8080 \
--dns-name-label DNS_NAME \
--restart-policy Always \
--registry-username [dockerhub_username] \
--registry-password [dockerhub_password] \
--registry-login-server index.docker.io -
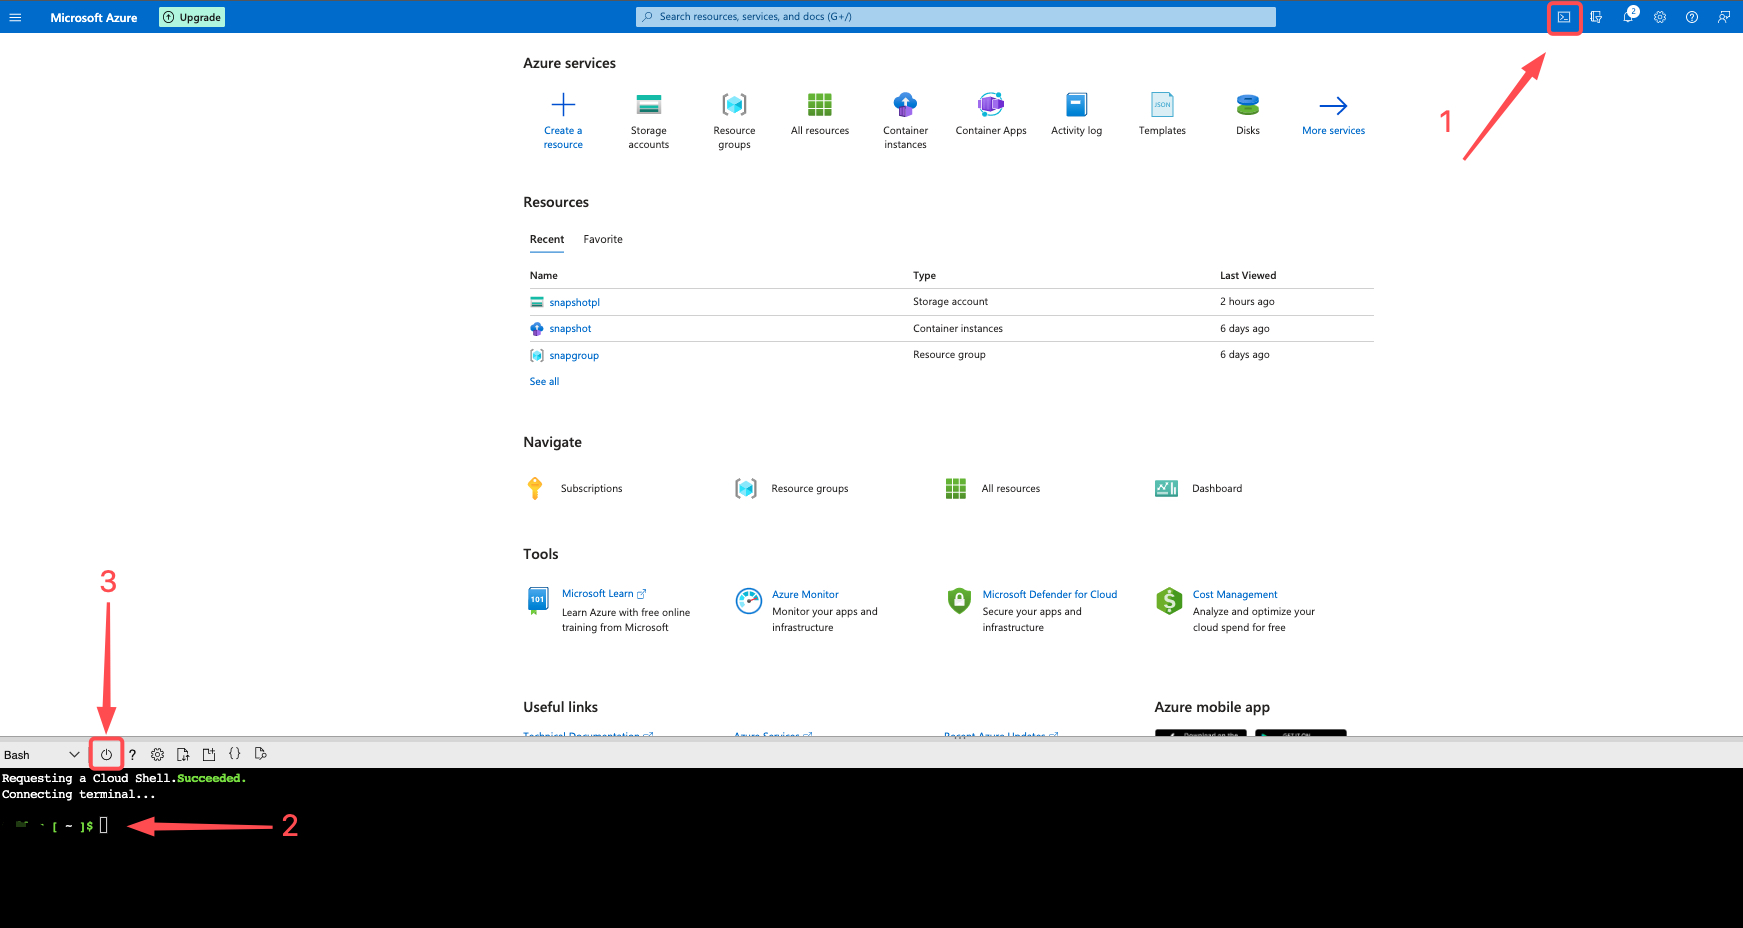
Open the terminal to execute the container creation command in the previous step, follow the step below to open the console.
tipTo ensure that the container finds the volume created earlier, after opening the terminal, restart the terminal using item 3 in the image below.
-
After creating your container instance, follow the steps below to verify it is created and started correctly (the Status should be "Running " as per item 3 in the image). You can test if the instance is running by accessing the FQDN (item 4 in the image) adding the port 8080 and the /info suffix for SDK information.
Example: https://YOUR_FQDN:8080/info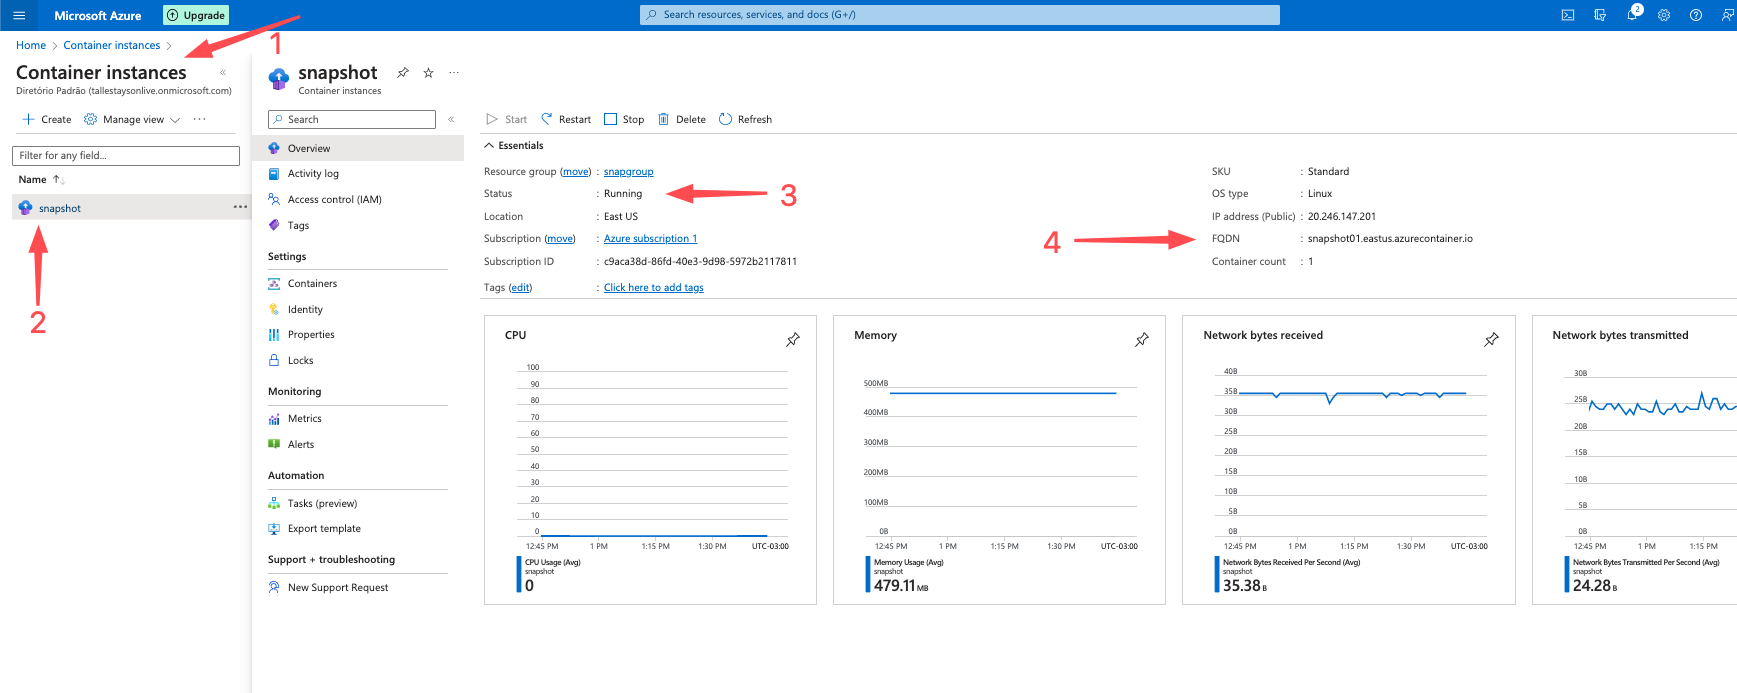
Snapshot SDK container instance takes about 2 minutes to respond on its first startup.
These steps are sufficient to deploy the Snapshot SDK to a container instance in Azure, please note that this deployment performs the basic configuration of a container instance, if you require advanced configuration please check the Azure documentation
