Webhook Middleware Integrations
Getting Started
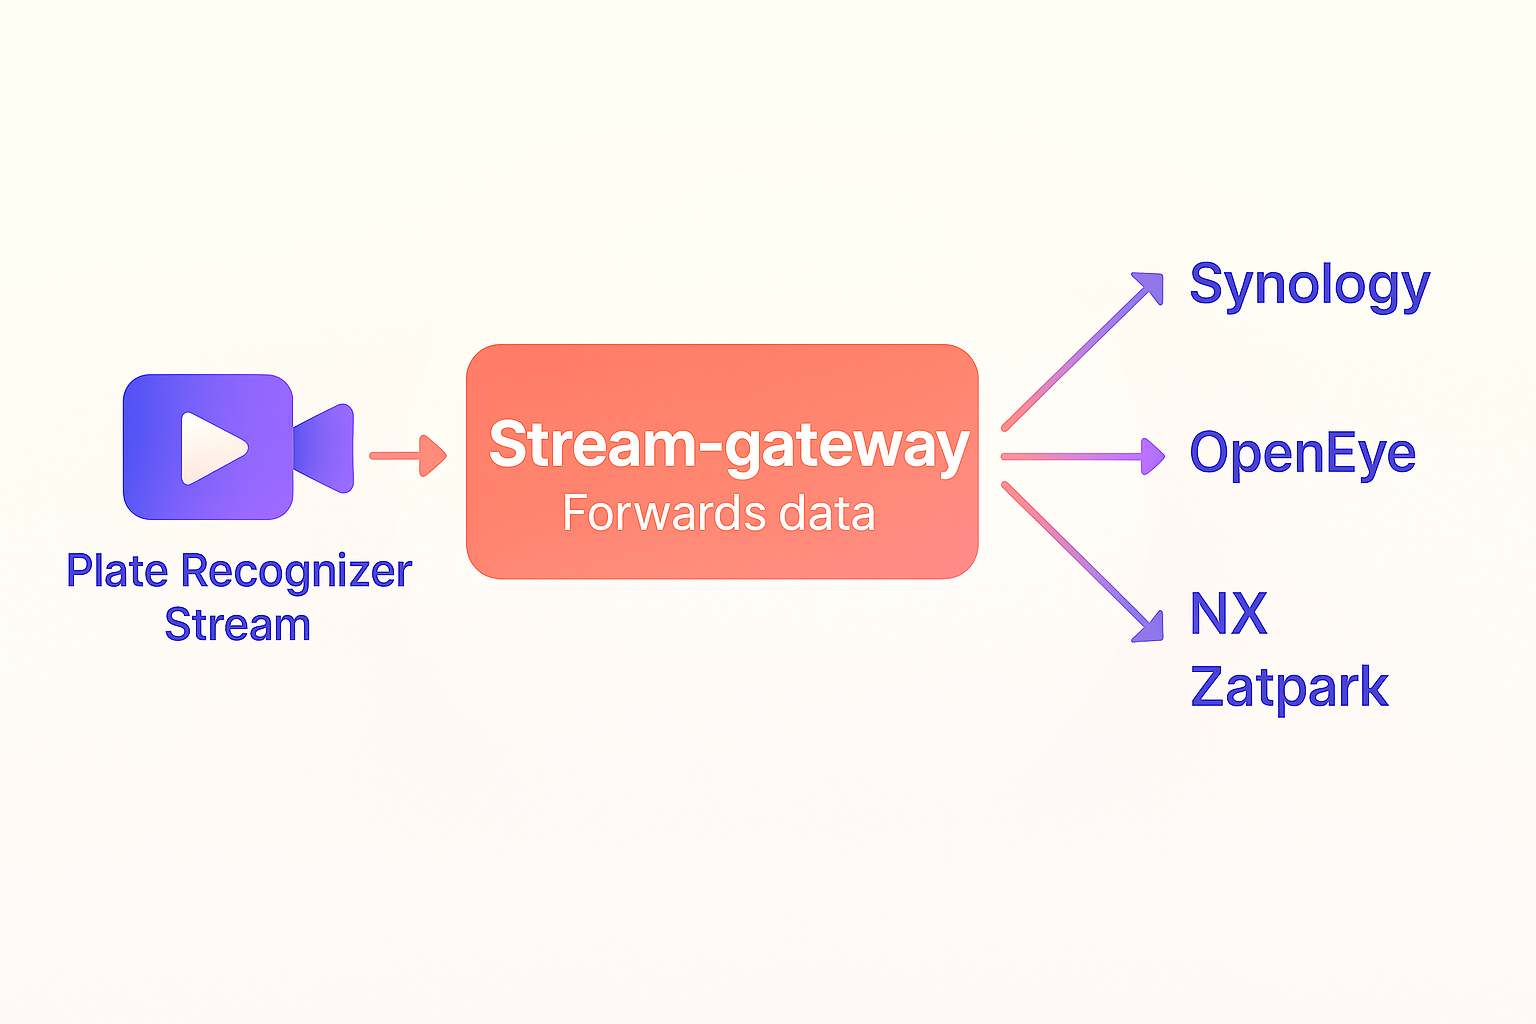
The Stream-Gateway is a versatile middleware layer that captures and processes webhook data from Plate Recognizer Stream. Depending on the selected integration, it can simply forward data to external services, apply transformations such as image cropping, filter events based on business rules (e.g., direction of travel), or enrich data before taking further action. This modular design ensures seamless compatibility with a wide range of use cases — from direct API forwarding to local processing workflows — providing flexibility for different operational needs.
To integrate the middleware, you'll first need to configure the environment variables and run the middleware. This section guides you through creating the necessary .env file, running the middleware, and configuring Stream to send webhook data to your middleware.
Step 1: Create the .env File
Each middleware requires specific environment variables for its configuration. Below is a general guide on creating the .env file for different middleware options. Make sure to modify the variables according to the middleware you're using.
Sample .env File for Synology REST Protocol Middleware
MIDDLEWARE_NAME=synology_rest
REST_SERVICE_URL=https://example.com/rest-service
Refer to the respective middleware section for other middleware-specific configurations.
Step 2: Run the Middleware
After setting up the .env file, you can run the middleware. This will ensure the middleware is listening for webhook data from the Stream.
Common Run Command
For all middleware, use the following command to run the middleware Docker container:
docker run -it --env-file .env -p 8002:8002 --name stream-gateway --restart unless-stopped platerecognizer/stream-gateway
This command will run the middleware on port 8002, exposing it to receive webhook data.
Step 3: Install Plate Recognizer Stream
Plate Recognizer Stream processes video streams and generates webhook data based on license plate recognition events.
Installation
Follow the installation instructions for your operating system:
- Linux, MacOS, Windows, and Docker: Stream Installation Guide
Step 4: Configure Stream to Send Webhook Data
Once the middleware is up and running, configure Plate Recognizer Stream to send webhook data to the middleware.
Webhook Configuration
Edit the Stream configuration file (typically named config.ini) to include the following webhook settings:
webhook_targets = middleware

[webhooks]
caching = yes

[[middleware]]
url = http://YOUR_IP_ADDRESS:8002
image = vehicle, plate
request_timeout = 30
For more details on webhook configuration, refer to the Webhook Configuration Guide.
Middleware Integrations
This guide covers how to configure and run various middleware protocols for handling webhook data.
Available Middleware
| Middleware | Description |
|---|---|
| Synology REST Protocol Middleware | Forwards webhook data to a REST service. |
| Crop Plate and Forward Middleware | Crops an image and forwards data to a webhook. |
| Salient VMS Middleware | Forwards events to CompleteView/Salient VMS. |
| OpenEye Middleware | Forwards parsed JSON data to OpenEye monitoring API. |
| NX Middleware | Manages sessions and creates bookmarks in NX server. |
| SOAP Protocol Middleware | Forwards webhook data to a SOAP service. |
| DOT Middleware | Filters webhook data based on Direction of Travel. |
| Zatpark | Forwards webhook data to a Zatpark service. |
| Strip Plate Middleware | Removes plate text for privacy, forwards event. |
| Front-Rear Middleware | Pairs front/rear cameras to detect plate mismatches. |
| Image Annotation Middleware | Annotates license plate and forwards image. |
Synology REST Protocol Middleware
Description: Forwards webhook data to a REST service.
Required Environment Variables
MIDDLEWARE_NAME=synology_restREST_SERVICE_URL: The URL of the REST service.
Crop Plate and Forward Middleware
Description: Crops an image from webhook data and forwards both the original and cropped images to another webhook endpoint.
Required Environment Variables
MIDDLEWARE_NAME=crop_plateWEBHOOK_URL: The URL of the webhook endpoint where data is forwarded.
Salient VMS Middleware
Description: Forwards Stream webhook events to a CompleteView/Salient VMS as events.
Required Environment Variables
MIDDLEWARE_NAME=salientVMS_USERNAME: Username for Salient VMS.VMS_PASSWORD: Password for Salient VMS.VMS_API_URL: API endpoint for Salient VMS.CAMERA_UID: UID of the camera used as the source of events.
OpenEye Middleware
Description: Forwards parsed JSON data to the OpenEye Event Receiver API (Analytics) Integration.
Required Environment Variables
MIDDLEWARE_NAME=openeyeAKI_TOKEN: AKI token for authentication.AKS_TOKEN: AKS token for authentication.
Where AKI_TOKEN and AKS_TOKEN are generated after enabling Event Receiver API (Analytics) in your OpenEye account. Example: AKI_TOKEN=F3DG9VNNLW5N, AKS_TOKEN=oSTXy0kgDvOajDl6JaLNWUOjYmLQSLwC
Webhook Configuration for OpenEye
In your OpenEye system, go to the Location/Camera settings and retrieve the Camera External ID.
This value must be mapped as camera-id.
The OpenEye middleware requires the camera-id to be included in the webhook header.
Configure your Stream’s config.ini file as follows:
Example with a single camera:
webhook_targets = webhook-camera-01

[webhooks]
caching = yes

[[webhook-camera-01]]
url = http://YOUR_IP_ADDRESS:8002
image = vehicle, plate
request_timeout = 30
header = camera-id: XXXXXXXXXXXXXXXXXXXXXXXXXXXXXXXXXXXXXXX
Example with multiple cameras (N cameras):
webhook_targets = webhook-camera-01, webhook-camera-02

[webhooks]
caching = yes

[[webhook-camera-01]]
url = http://YOUR_IP_ADDRESS:8002
image = vehicle, plate
request_timeout = 30
header = camera-id: YYYYYYYYYYYYYYYYYYYYYYYYYYYYYYYYYYYYYYY

[[webhook-camera-02]]
url = http://YOUR_IP_ADDRESS:8002
image = vehicle, plate
request_timeout = 30
header = camera-id: XXXXXXXXXXXXXXXXXXXXXXXXXXXXXXXXXXXXXXX
For each camera, add a new [[webhook-camera-XX]] block with its corresponding camera-id in the header. The camera-id must be a unique identifier for each camera and will be used by OpenEye to identify the source of the event.
NX Middleware
Description: Manages a session with an NX server, retrieves tags from the Parkpow API, and creates bookmarks in the server using the REST API. This middleware is compatible with Nx Witness (NX), DW Spectrum, and Hanwha Wave VMS platforms, as they share the same REST API architecture.
Required Environment Variables
MIDDLEWARE_NAME=nxSERVER_HOST: Host URL of the NX server.LOGIN: Username for server login.PASSWORD: Password for server login.SSL: Boolean value for enabling SSL verification (TrueorFalse).PARKPOW_TOKEN: Token for accessing the Parkpow API.TAG: Tag used for filtering in the Parkpow API. (e.g. TAG=Block,Authorized)
Vehicles retrieved from the Parkpow API using the configured TAG will have that same tag applied to the bookmark created in the NX/DW/Hanwha VMS when the vehicle is detected by Stream. Vehicles without this tag will be bookmarked with the default "Stream" tag.
Webhook Configuration for NX Middleware
The NX middleware requires the camera-id to be sent via the webhook header. This camera-id corresponds to the physical ID of the camera in your NX/DW/Hanwha VMS system and can be obtained in the camera configuration settings of your VMS. Configure your Stream config.ini file as follows:
Example with a single camera:
webhook_targets = webhook-camera-01

[webhooks]
caching = yes

[[webhook-camera-01]]
url = http://YOUR_IP_ADDRESS:8002
image = vehicle, plate
request_timeout = 30
header = camera-id: FYJfghTYUytf%¨&87567564sdfsd234@#DFD
Example with multiple cameras (N cameras):
webhook_targets = webhook-camera-01, webhook-camera-02

[webhooks]
caching = yes

[[webhook-camera-01]]
url = http://YOUR_IP_ADDRESS:8002
image = vehicle, plate
request_timeout = 30
header = camera-id: XXXXXXXXXXXXXXXXXXXXXXXXXXXXXXXXXXXXXXX

[[webhook-camera-02]]
url = http://YOUR_IP_ADDRESS:8002
image = vehicle, plate
request_timeout = 30
header = camera-id: YYYYYYYYYYYYYYYYYYYYYYYYYYYYYYYYYYYYYYY
For each additional camera, add a new [[webhook-camera-XX]] block with the corresponding camera-id in the header. This ID must match the camera's physical ID in your NX/DW/Hanwha VMS system to ensure bookmarks are created correctly.
SOAP Protocol Middleware
Description: Forwards webhook data to a SOAP service.
Required Environment Variables
MIDDLEWARE_NAME=soapSOAP_SERVICE_URL: The URL of the SOAP service.SOAP_USER: Username for SOAP service authentication.SOAP_SERVICE_KEY: Key for SOAP service authentication.
DOT Middleware
Description: The DOT Middleware filters webhook data from Plate Recognizer Stream based on Direction of Travel (DOT) ranges. It checks if the vehicle's detected direction falls within the configured range for a given camera and forwards the filtered results to a destination webhook.
Required Environment Variables
MIDDLEWARE_NAME=dotSEND_FILE: Optional environment variable you can use if you want to forward the uploaded image as well.
Note: The
dot_config.csvfile contains the configuration for the cameras and their DOT ranges. It must be mounted to the container for the middleware to process the data correctly.
Sample dot_config.csv
Here's a sample dot_config.csv for your configuration:
CameraID,StartDOT,EndDOT,Destination
camera-1,20,160,https://example.com/webhook/front-gate
camera-2,110,250,https://example.com/webhook/parking-lot
camera-3,315,45,https://example.com/webhook/night-shift
To run the middleware with docker run, you can use the following command:
docker run --env-file .env -p 8002:8002 -v ./dot_config.csv:/app/dot_config.csv:ro --restart unless-stopped platerecognizer/stream-gateway
Docker Compose Integration
You can also use Docker Compose to manage both the Stream and Middleware services. Here's an example docker-compose.yml file:
version: "3.8"

services:
  stream:
    image: platerecognizer/alpr-stream
    container_name: stream
    restart: unless-stopped
    privileged: true
    group_add:
      - video
    volumes:
      - "/opt/stream:/user-data" # Adjust the path to match your setup
    environment:
      - LICENSE_KEY=${STREAM_LICENSE_KEY} # Keep the license key to .env
      - TOKEN=${STREAM_API_TOKEN} # Keep the API token to .env

  middleware:
    image: platerecognizer/stream-gateway
    container_name: dot_middleware
    restart: unless-stopped
    env_file: .env
    ports:
      - "8002:8002"
    volumes:
      - ./dot_config.csv:/app/dot_config.csv:ro # Mount the dot_config.csv file for dot middleware
This Docker Compose configuration will launch both the Stream license plate recognition service and the Middleware service simultaneously. The setup automatically applies the environment variables from your .env file and mounts the necessary volumes for both services. While this example demonstrates the configuration for the DOT middleware, you can adapt it for any of the middleware types described in this document by adjusting the environment variables and volume mounts accordingly.
Zatpark Middleware
Description: Forwards webhook data to a Zatpark service.
Required Environment Variables
MIDDLEWARE_NAME=zatparkZATPARK_SERVICE_URL: https://URL-PROVIDED-BY-ZATPARK
You must contact Zatpark support ([email protected]) before proceeding with the integration. Be sure to:
- Request the unique API access URL for your account.
- Provide the MAC address of each device (camera) that will be integrated. These MAC addresses must be explicitly authorized by Zatpark support.
After receiving the API URL from Zatpark support and having your camera's MAC address authorized, add the required environment variables to your .env file and run the middleware using the command shown in Step 2 of the setup guide.
The MAC address configuration must be added to your webhook settings in the config.ini file. This step complements Step 4, and involves explicitly adding the MAC address to each webhook target, as shown below.
Example with a single camera:
webhook_targets = webhook-camera-01

[webhooks]
caching = yes

[[webhook-camera-01]]
url = http://YOUR_IP_ADDRESS:8002
image = vehicle, plate
request_timeout = 30
header = mac-address: xx:xx:xx:xx:xx:xx
Example with multiple cameras (N cameras):
webhook_targets = webhook-camera-01, webhook-camera-02

[webhooks]
caching = yes

[[webhook-camera-01]]
url = http://YOUR_IP_ADDRESS:8002
image = vehicle, plate
request_timeout = 30
header = mac-address: xx:xx:xx:xx:xx:xx

[[webhook-camera-02]]
url = http://YOUR_IP_ADDRESS:8002
image = vehicle, plate
request_timeout = 30
header = mac-address: yy:yy:yy:yy:yy:yy
For each additional camera, add a new [[webhook-camera-XX]] block with the corresponding authorized MAC address.
Strip Plate Middleware
Description: The Strip Plate protocol removes only the license plate transcription (the actual plate text) from each incoming Stream event and from the jsonl file on disk. All other event metadata (bounding boxes, camera info, etc.) is left intact and unaltered. The sanitized event is then forwarded to ParkPow via the configured webhook.
Use Case: Ideal for privacy-sensitive scenarios where you want to process license plate recognition events but do not want to store or share the actual plate text.
Data Flow:
- Stream detects a license plate and generates a webhook.
- The Strip Plate middleware receives the webhook and removes the plate text from the event.
- The sanitized data is forwarded to ParkPow via the configured webhook.
Protocol Source Code: Strip Plate Protocol on GitHub
Required Environment Variables
MIDDLEWARE_NAME=strip_plateWEBHOOK_URL: Destination URL to forward the sanitized event.PARKPOW_TOKEN: Token for authenticating with ParkPow.STREAM_LICENSE_KEY: License key for Plate Recognizer Stream (only required fordocker-composestreamservice).STREAM_API_TOKEN: API token for Plate Recognizer Stream (only required fordocker-composestreamservice).
Sample .env file
MIDDLEWARE_NAME=strip_plate
STREAM_LICENSE_KEY=your_stream_license_key
STREAM_API_TOKEN=your_stream_api_token
WEBHOOK_URL=https://api.parkpow.com/stream-webhook
PARKPOW_TOKEN=your_parkpow_token
Sample docker-compose.yml
version: "3.8"

services:
  stream:
    image: platerecognizer/alpr-stream
    container_name: stream
    restart: unless-stopped
    privileged: true
    group_add:
      - video
    volumes:
      - "/opt/stream:/user-data"
    environment:
      - LICENSE_KEY=${STREAM_LICENSE_KEY}
      - TOKEN=${STREAM_API_TOKEN}

  middleware:
    image: platerecognizer/stream-gateway
    container_name: strip_plate_middleware
    restart: unless-stopped
    env_file: .env
    ports:
      - "8002:8002"
    volumes:
      - "/opt/stream:/user-data" #required to access the jsonl file and strip data there too
Deployment:
- Create the
.envfile with the variables above. - Adapt the
docker-compose.ymlfile as needed for your environment. - Run
docker compose up -dto start both services.
Front-Rear Middleware
Description: Correlates license plate readings from paired front and rear cameras to validate vehicles against a known database and trigger alerts for mismatches, missing rear plates, make/model discrepancies, and potentially offline cameras. All alerts are forwarded to ParkPow.
Use Case: Ideal for access control lanes, parking entry/exit points, or any checkpoint where both the front and rear of a vehicle must be captured and cross-validated.
Data Flow:
- Stream sends a webhook to the middleware when a plate is detected on a front or rear camera.
- The middleware buffers the event and waits for the paired camera's reading within the configured
time_window_seconds. - When both readings arrive, the middleware compares plates and make/model data against the vehicle database (CSV).
- Alerts are sent to ParkPow for any detected anomaly.
- If only one camera's reading arrives within the window, the middleware processes the single-camera event and triggers a
camera_offlinealert for the missing side.
Required Environment Variables
MIDDLEWARE_NAME=front_rearSTREAM_API_TOKENS: Comma-separated list of valid Stream API tokens used to authenticate incoming webhooks (e.g.token1,token2).PARKPOW_TOKEN: Token for authenticating with ParkPow (alerts and webhook forwarding).
Sample .env file
MIDDLEWARE_NAME=front_rear
STREAM_API_TOKENS=your_stream_api_token
PARKPOW_TOKEN=your_parkpow_token
The STREAM_API_TOKENS environment variable accepts multiple comma-separated tokens, allowing multiple Stream instances to send webhooks to the same middleware.
Important: The Authorization header in the Stream webhook must match one of the tokens in STREAM_API_TOKENS exactly:
Example: header = Authorization: Token <token1>
Requests with headers that do not match a token in STREAM_API_TOKENS will be rejected by the middleware.
Configuration File
The middleware reads protocols/config/front_rear_config.json on startup and hot-reloads it automatically whenever the file changes — no restart needed.
Sample front_rear_config.json
{
  "camera_pairs": [
    {
      "front": "camera-front-01",
      "rear": "camera-rear-01",
      "description": "Main Entrance"
    },
    {
      "front": "camera-solo-front",
      "rear": null,
      "description": "Exit Lane (front only)"
    },
    {
      "front": null,
      "rear": "camera-solo-rear",
      "description": "Entry Lane (rear only)"
    }
  ],
  "thresholds": {
    "make_model_confidence": 0.2
  },
  "pairing": {
    "time_window_seconds": 30,
    "cleanup_interval_seconds": 60
  },
  "front_rear_csv_path": "protocols/config/front_rear.csv",
  "parkpow": {
    "alert_endpoint": "https://app.parkpow.com/api/v1/trigger-alert/",
    "webhook_endpoint": "https://app.parkpow.com/api/v1/webhook-receiver/"
  },
  "alerts": {
    "plate_mismatch": {
      "enabled": true,
      "name": "Front-Rear Plate Mismatch",
      "alert_template_id": 10482
    },
    "no_rear_plate": {
      "enabled": true,
      "name": "Front-Rear No Rear Plate",
      "alert_template_id": 10483
    },
    "make_model_mismatch": {
      "enabled": true,
      "name": "Front-Rear Make/Model Mismatch",
      "alert_template_id": 10484
    },
    "camera_offline": {
      "enabled": true,
      "name": "Front-Rear Camera Possibly Offline",
      "alert_template_id": 10485
    }
  }
}
Configuration fields
| Field | Description |
|---|---|
camera_pairs | List of camera pairs. Either front or rear can be null for solo-camera setups. |
thresholds.make_model_confidence | Minimum confidence score (0–1) for a make/model detection to trigger a mismatch alert. Default: 0.2. |
pairing.time_window_seconds | Maximum time (seconds) to wait for the paired camera before processing as a single event. Default: 30. |
pairing.cleanup_interval_seconds | How often (seconds) the background cleanup task runs to purge expired buffered events. Default: 60. |
front_rear_csv_path | Path to the vehicle database CSV file. |
parkpow.alert_endpoint | ParkPow endpoint to trigger alerts. |
parkpow.webhook_endpoint | ParkPow endpoint to forward camera events (creates a visit). |
alerts.<type>.enabled | Set to false to disable a specific alert without removing its config. |
alerts.<type>.alert_template_id | ParkPow alert template ID to use for each alert type. |
Vehicle Database CSV
The CSV is mandatory. The middleware calls _load_vehicles_csv() on startup before anything else — if the file is missing or empty, the application throws an exception and does not start.
Purpose: The CSV is the list of known/authorized vehicles. It maps each plate to its expected make and model. The middleware uses this data for two alerts:
plate_mismatch— if a detected plate (front or rear) is not in the CSV, an alert is triggered. The assumption is that every legitimate vehicle must be registered; if it isn't, it's suspicious.make_model_mismatch— if a plate is in the CSV but the make/model detected by the camera does not match the registered value (and confidence is above the threshold), an alert is triggered. For example: the CSV saysABC1234is a Toyota Camry, but the camera detected a Honda Accord.
CSV format:
MAKE,MODEL,LICENSE_PLATE
JEEP,CHEROKEE,ABC1234
HONDA,CIVIC,BCD2345
TOYOTA,COROLLA,CDE3456
Important rules:
- The CSV is required — the middleware will not start without it.
- The fields LICENSE_PLATE, MAKE, and MODEL cannot be empty in your CSV file. They are mandatory and must be filled.
- Plates are matched case-insensitively (normalized to uppercase internally).
- Duplicate plates are ignored entirely — if the same plate appears more than once, none of its entries are loaded. Each plate must appear exactly once.
- Changes to the CSV are detected and hot-reloaded automatically by the cleanup task — no restart needed.
Where the file must be placed:
Place the CSV inside the protocols/config/ directory on the host machine. The entire directory is mounted into the container via the volume defined in the compose file — see the Deployment section for the full setup.
Alerts
Alerts can be enabled in the configuration file front_rear_config.json under "alerts" by setting "enabled" to true for the alert type you want to receive.
Important: Alerts must be created beforehand in ParkPow. Once you access a created alert in the ParkPow interface, check the URL to see the ID assigned to that alert. This ID must be added to the corresponding alert in the configuration file under "alert_template_id".
| Alert | Trigger condition |
|---|---|
plate_mismatch | A detected plate (front or rear) is not found in the vehicle database CSV. |
no_rear_plate | A front plate was detected but the rear camera returned no plate within the pairing window. |
make_model_mismatch | The detected make/model (above confidence threshold) does not match what is registered in the CSV for that plate. |
camera_offline | A new vehicle was detected on one camera but the paired camera never sent a reading — indicating the paired camera may be offline. Also fires when the cleanup task expires a buffered unpaired event. |
HTTP Response Codes
The middleware returns the following HTTP status codes to Stream:
| Status | Meaning |
|---|---|
200 | Both cameras in the pair were received and processed successfully. |
202 | Event buffered — waiting for the paired camera's reading. |
401 | Missing or malformed Authorization header. |
403 | Invalid token. |
404 | Camera not found in any configured pair. |
424 | Internal error — visit_id was null after forwarding to ParkPow. |
503 | ParkPow unreachable or timed out. |
Deployment with Docker Compose and Caddy
The front-rear middleware uses Caddy as a reverse proxy to handle inbound HTTPS traffic and forward requests to the middleware service.
Directory structure required before starting:
.
├── docker-compose.caddy.yml
├── docker-compose.yml
├── .env
├── caddy/
│   └── Caddyfile
└── protocols/
    └── config/
        ├── front_rear_config.json
        └── front_rear.csv
All files in protocols/config/ must be created manually before starting the container. The volume mounts them as read-only into the container — the container reads but never writes to this directory.
Caddyfile
Replace <domain name> with your server's fully qualified domain name (FQDN):
middleware.example.com {
    reverse_proxy middleware:8002 {
        health_uri      /health
        health_interval 30s
        health_timeout  5s
    }
}
Additional Caddy configuration options are available in the official Caddy documentation. You can customize TLS behavior, logging, headers, rate limiting, authentication, and other advanced reverse proxy settings directly in the Caddyfile.
Caddy automatically provisions a TLS certificate via Let's Encrypt, redirects HTTP to HTTPS, and uses the /health endpoint to verify that the middleware service is reachable. If the middleware fails the health check, Caddy stops forwarding requests to it.
Your domain must have a DNS A record pointing to the server's public IP address before Caddy can provision the TLS certificate.
docker-compose.caddy.yml (recommended for production — includes HTTPS and health checks)
services:
  middleware:
    image: platerecognizer/stream-gateway
    container_name: middleware
    restart: unless-stopped
    env_file: .env
    expose:
      - "8002"
    volumes:
      - ./protocols/config:/app/protocols/config:ro
    networks:
      - middleware-net

  caddy:
    image: caddy:2-alpine
    container_name: caddy
    restart: unless-stopped
    ports:
      - "80:80"
      - "443:443"
    volumes:
      - ./caddy/Caddyfile:/etc/caddy/Caddyfile:ro
      - caddy_data:/data
      - caddy_config:/config
      - caddy_logs:/var/log/caddy
    networks:
      - middleware-net

networks:
  middleware-net:
    driver: bridge

volumes:
  caddy_data:
  caddy_config:
  caddy_logs:
docker-compose.yml (middleware only, for local/testing use)
services:
  middleware:
    image: platerecognizer/stream-gateway
    container_name: middleware
    restart: unless-stopped
    env_file: .env
    ports:
      - "8002:8002"
    volumes:
      - ./protocols/config:/app/protocols/config:ro
Start with Caddy (production):
docker compose -f docker-compose.caddy.yml up -d
Start without Caddy (middleware only):
docker compose up -d
Check logs:
docker compose -f docker-compose.caddy.yml logs -f
Stop:
docker compose -f docker-compose.caddy.yml down
The Caddy setup described here is specific to the front_rear middleware. The /health endpoint used by Caddy for health checks is only available for this protocol — other middleware components will return 404 for this route.
Health Check
The middleware exposes a /health endpoint designed for monitoring and load balancer integrations. Currently, this endpoint is available only for the front_rear protocol.
GET /health
Response when healthy (200):
{
  "status": "healthy",
  "middleware": "front_rear"
}
Response when unhealthy (503):
{
  "status": "unhealthy",
  "reason": "Middleware not loaded"
}
Example with curl:
curl http://YOUR_IP_ADDRESS:8002/health
Logs Streaming
The middleware exposes a /logs endpoint that streams application logs in real-time, similar to docker logs -f. Useful for debugging without direct access to the container. Currently, this endpoint is available only for the front_rear protocol.
To enable it, set the ADMIN_TOKEN environment variable in your .env file:
ADMIN_TOKEN=<some-token>
GET /logs?lines=<n>
Authorization: Token <some-token>
| Parameter | Description |
|---|---|
lines | Number of historical log lines to show before streaming new output. Defaults to 50. Must be an integer. |
Example with curl:
curl -H "Authorization: Token <some-token>" \
  "http://YOUR_IP_ADDRESS:8002/logs"
Response codes:
| Status | Meaning |
|---|---|
200 | Log stream started (plain text, streaming). |
401 | Invalid or missing token. |
503 | ADMIN_TOKEN not configured on the server. |
Image Annotation Middleware
Description: The Image Annotation protocol draws a red rectangle around the license plate bounding box on the original image and forwards both the annotated image and the JSON metadata to a destination webhook.
Required Environment Variables
MIDDLEWARE_NAME=annotateWEBHOOK_URL: The destination URL where the annotated image and JSON data will be forwarded.
If you wish to modify or extend the middleware functionalities, you can access the source code on GitHub: