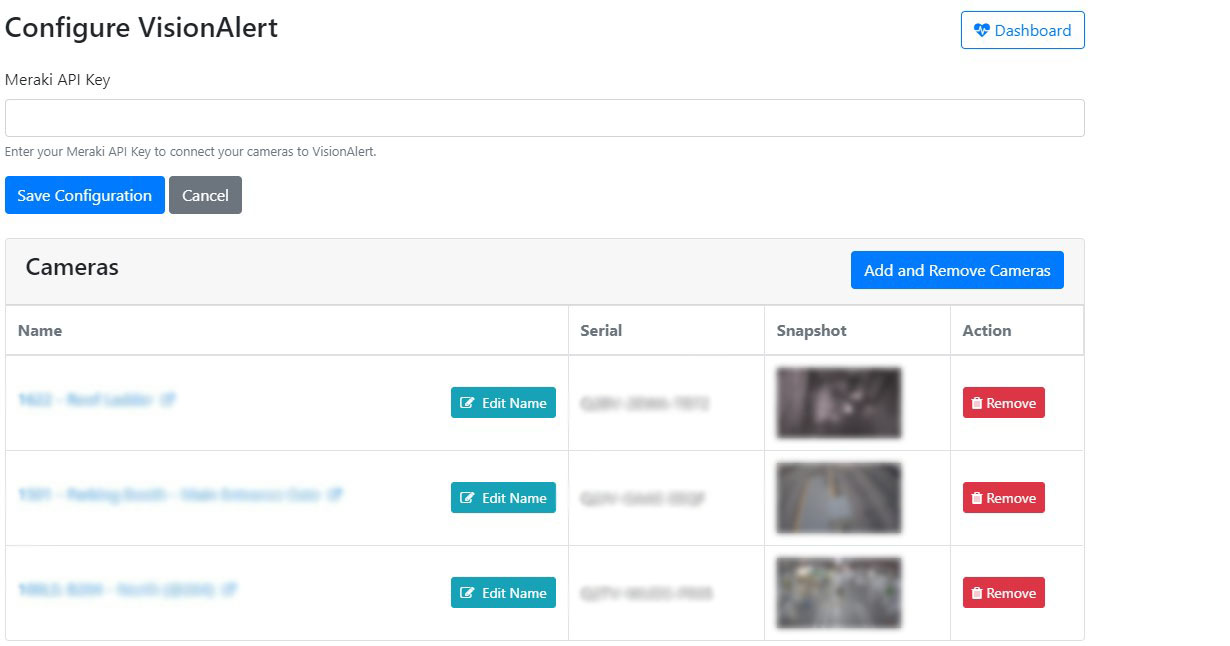
Configure VisionAlert
Add/Remove Cameras
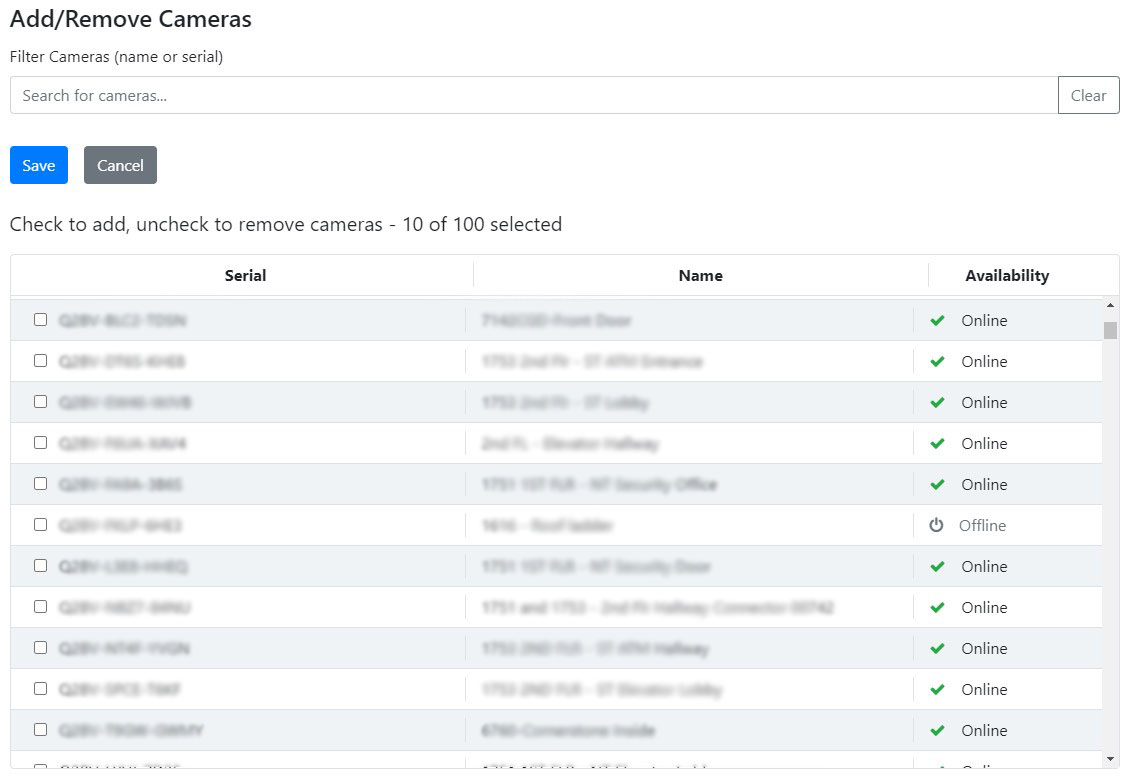
- On the license configuration page, click on the Add and Remove Cameras.
- On the Add/Remove Cameras page, you'll find a list of available cameras that you can connect to VisionAlert. This list includes each camera's serial number, name, and availability status.
-
Simply check the boxes next to the cameras you wish to add, and then click Save.
-
Once the first snapshot has been retrieved, the cameras you added will appear on the configuration page.
Dashboard
- To access the dashboard, click the Dashboard button on the configuration page.
- On the dashboard page, you'll find an overview of the status for each added camera.
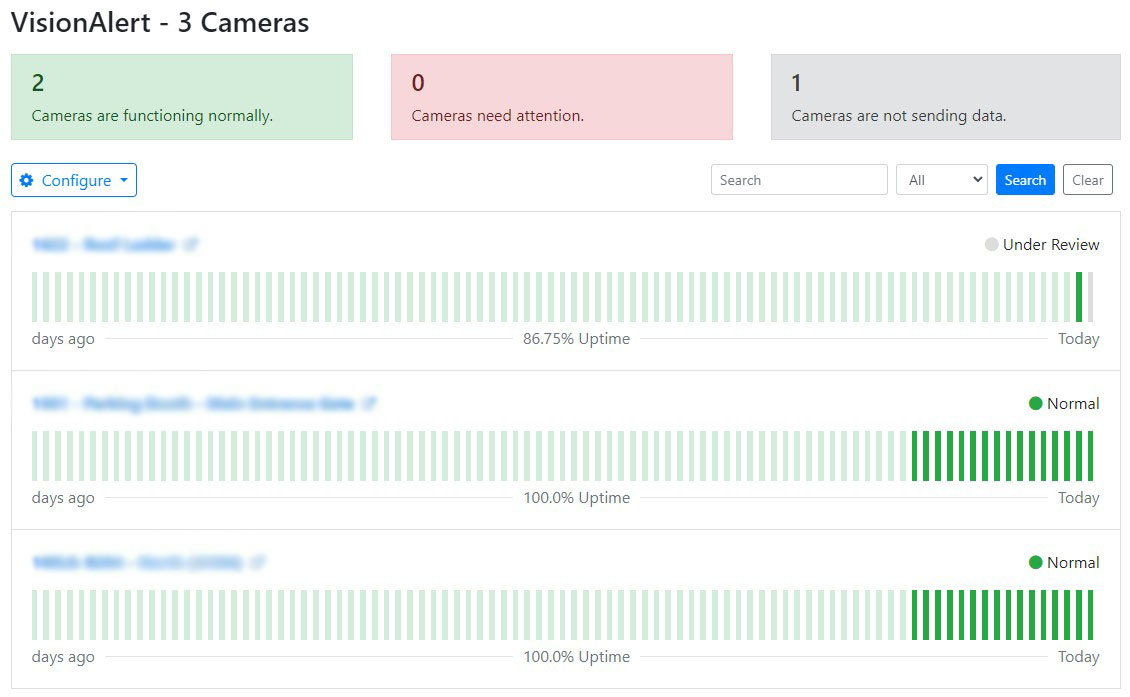
- You can also view the most recent snapshot from each camera by hovering on the status indicator.

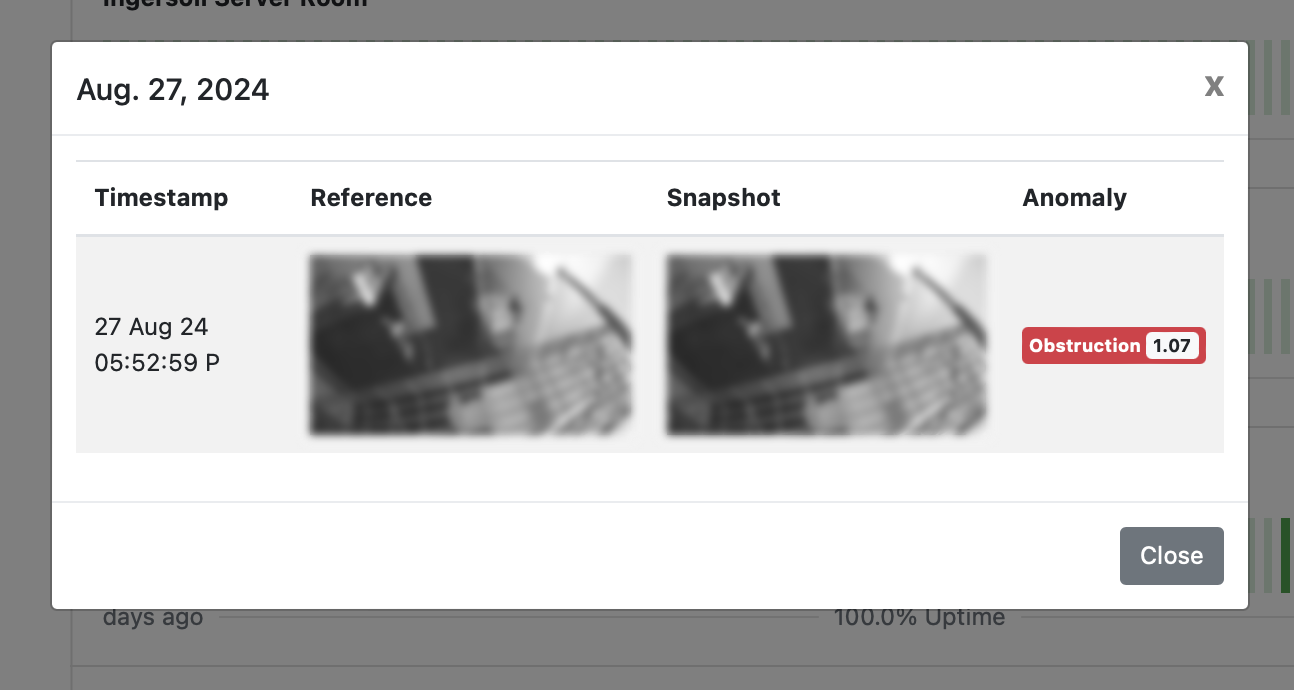
- If anomalies are detected in the camera feed, simply click on the status indicator for more information about the identified anomaly.