Azure Web Services
Azure Container Instances (ACI)
Azure Container Instances is a service in Azure that allows you to run Docker containers quickly and easily without managing the underlying infrastructure. With Azure Container Instances, you can run containers on demand and only pay for the duration of their execution. The service supports both Linux and Windows containers and integrates with other Azure services such as Azure Virtual Network, Azure Files, and Azure Monitor. You can deploy and manage your containers using the Azure portal, Azure CLI, Azure PowerShell, or through the Azure Container Instances REST API.
Setup instructions:
-
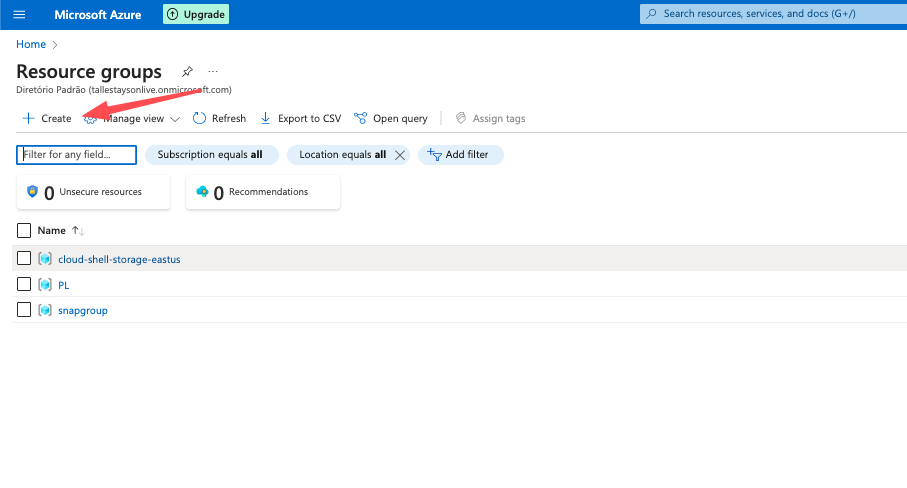
After logging into your Azure account, you must create a Resource Group that will be linked to this deployment, if you want to use an existing resource group this step can be skipped.
-
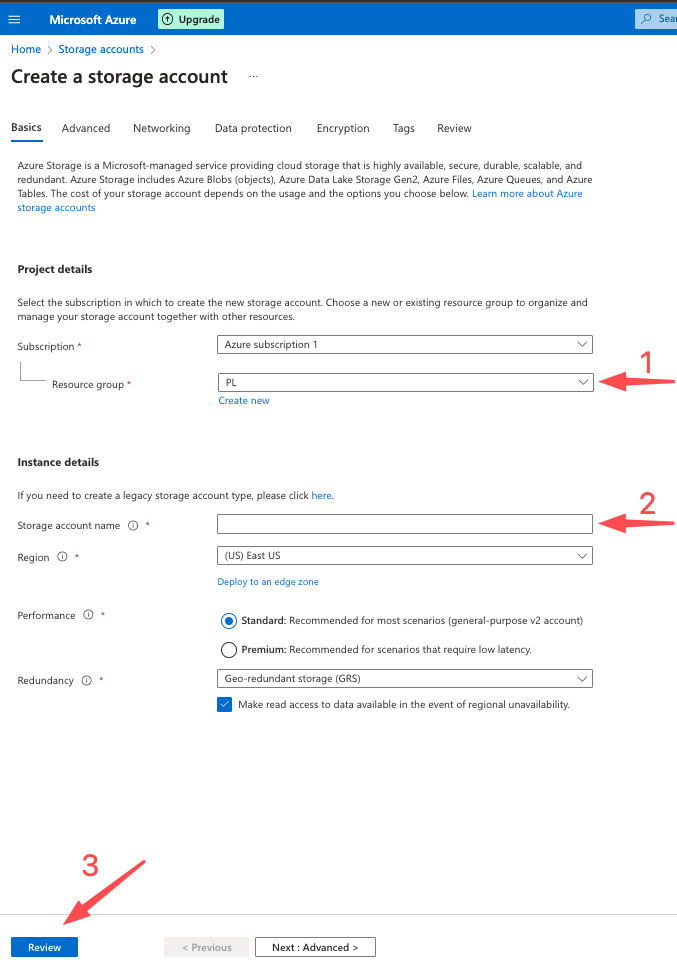
In this step, you will need to set up a storage account to create a shared file that will be linked to the container volume. For item 1 in the image below, you must provide the resource group created in the previous step.
-
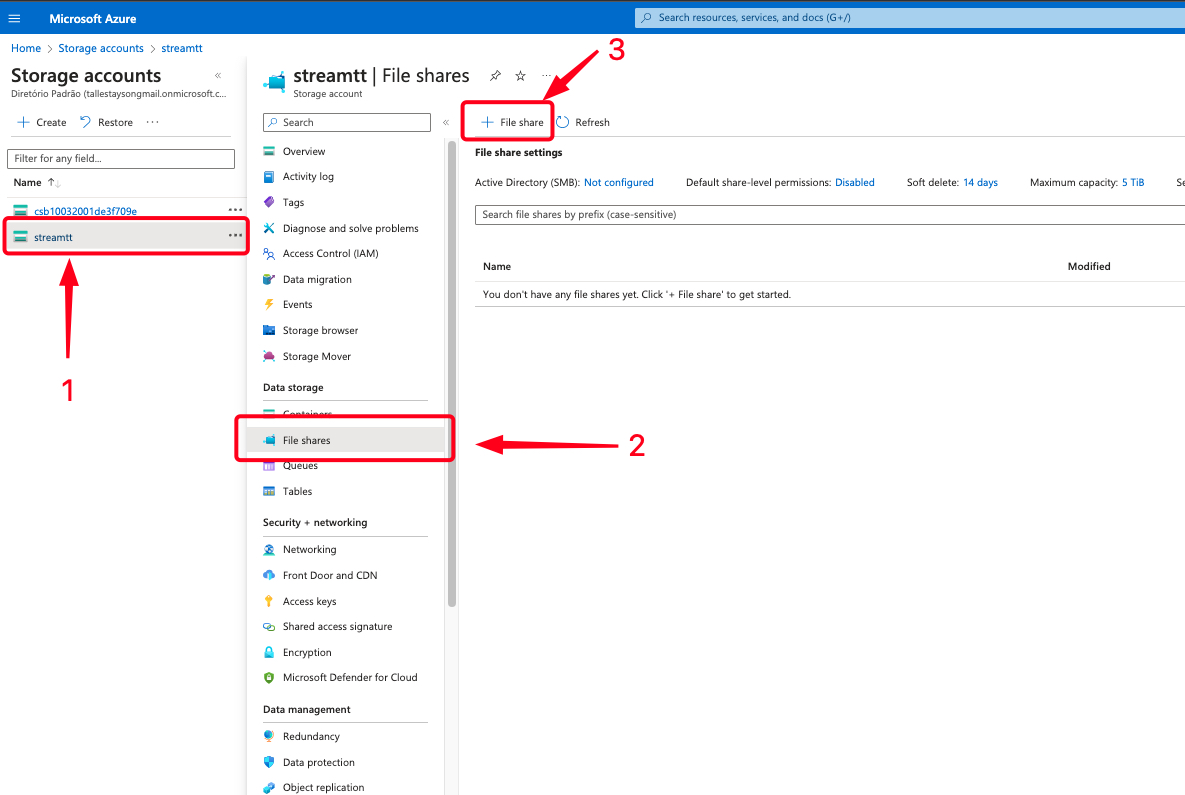
After creating the storage, it is necessary to share a file to function as a volume, the files generated by the flow will be available in this location, as well as the config.ini file. To create the volume, in the Storage account side menu, go to "File Share" and then click on "+ File Share", as can be seen in image below, define a file name that will be used in the next step.
-
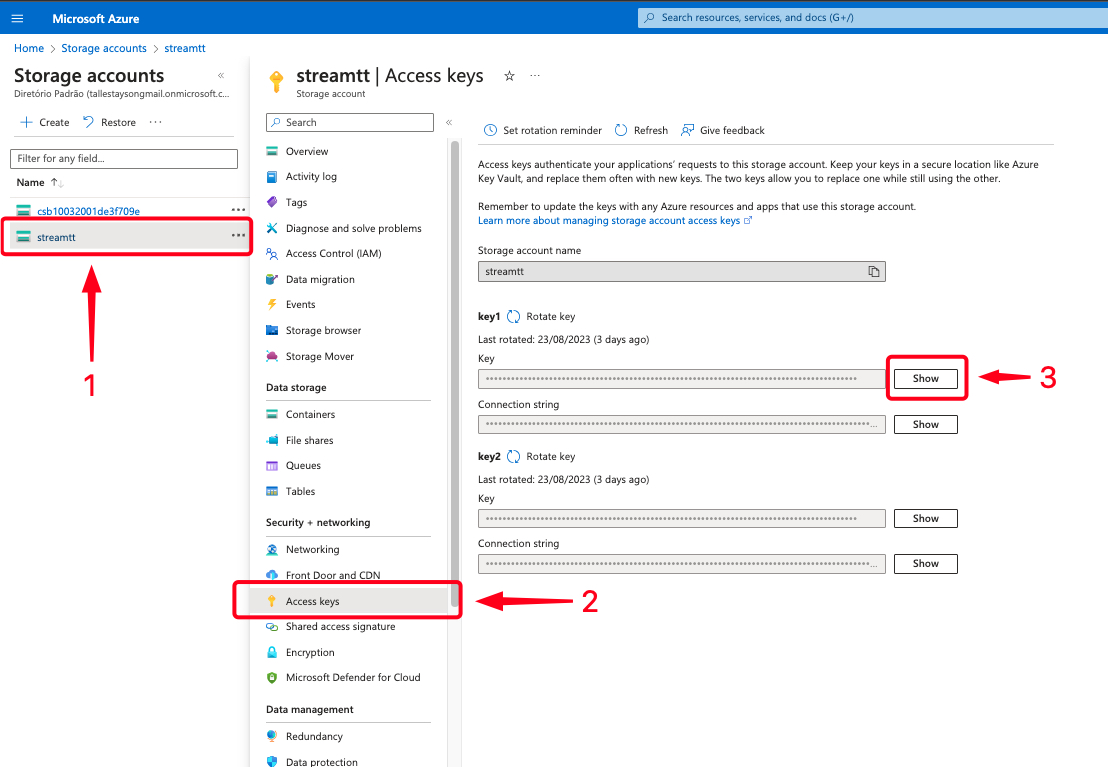
Still in the Storage account settings, copy the account access key to add to the container creation command by following the steps below.
-
Once you have your resource group and your storage account properly configured, it's time to build the command to run the Stream container.
Docker Hub Account RequirementDue to rate limitations from Docker Hub, anonymous users are restricted to a limited number of pulls for public images. It is necessary to create an account for increased access. You can sign up here. Add your credentials in the
--registry-usernameand--registry-passwordparameters when creating your container.This is the command structure:
az container create \
--resource-group RESOURCE_GROUP \
--name CONTAINER_NAME \
--image platerecognizer/alpr-stream \
--os-type Linux \
--cpu 1 \
--memory 1 \
--azure-file-volume-account-name STORAGE_NAME \
--azure-file-volume-account-key STORAGE_KEY_ACCOUNT \
--azure-file-volume-share-name STORAGE_FILESHARE_NAME \
--azure-file-volume-mount-path /user-data \
--environment-variables LICENSE_KEY=YOUR_LICENSE_KEY TOKEN=YOUR_API_TOKEN \
--restart-policy Always \
--registry-username [dockerhub_username] \
--registry-password [dockerhub_password] \
--registry-login-server index.docker.io
Replace RESOURCE_GROUP with the one you obtained in step 1, STORAGE_NAME with the one obtained in step 2, FILESHARE_NAME with the one obtained in step 3, and STORAGE_KEY_ACCOUNT with the one obtained in step 4.
TOKEN and LICENSE_KEY are parameters that can be obtained here. The values of CONTAINER_NAME you must define as you need them.
-
Follow the steps indicated in the image below to open the terminal and execute the command generated above to create the container.
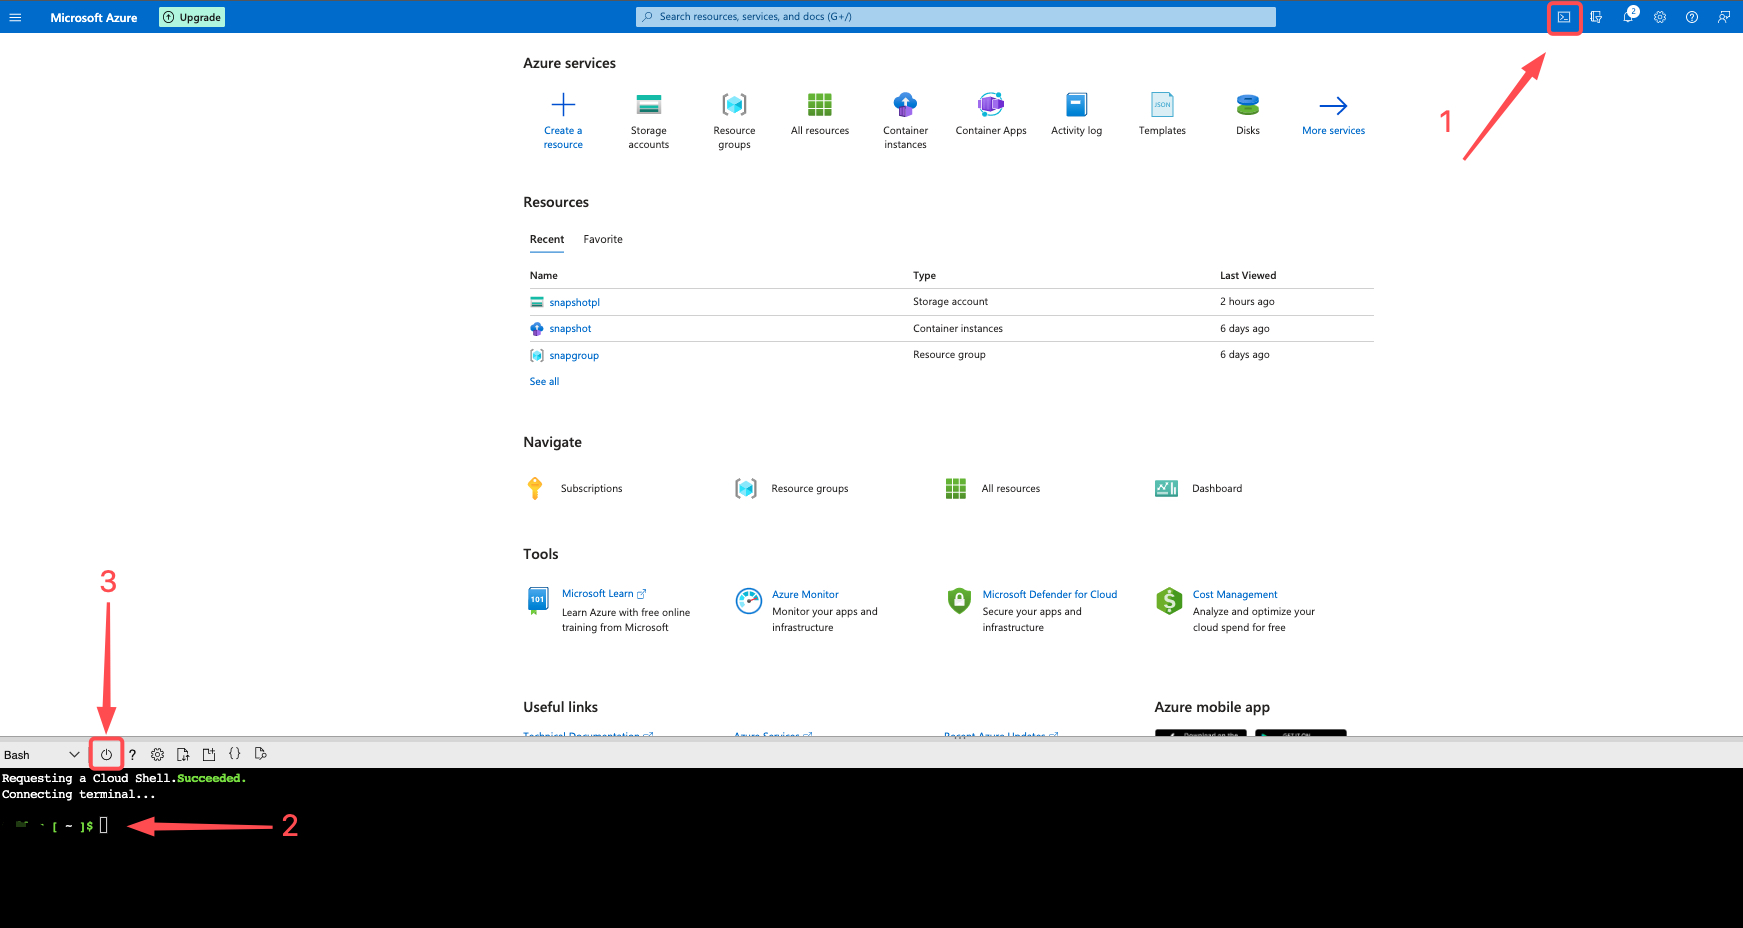 tip
tipTo ensure that the container finds the volume created earlier, after opening the terminal, restart the terminal using item 3 in the image below.
-
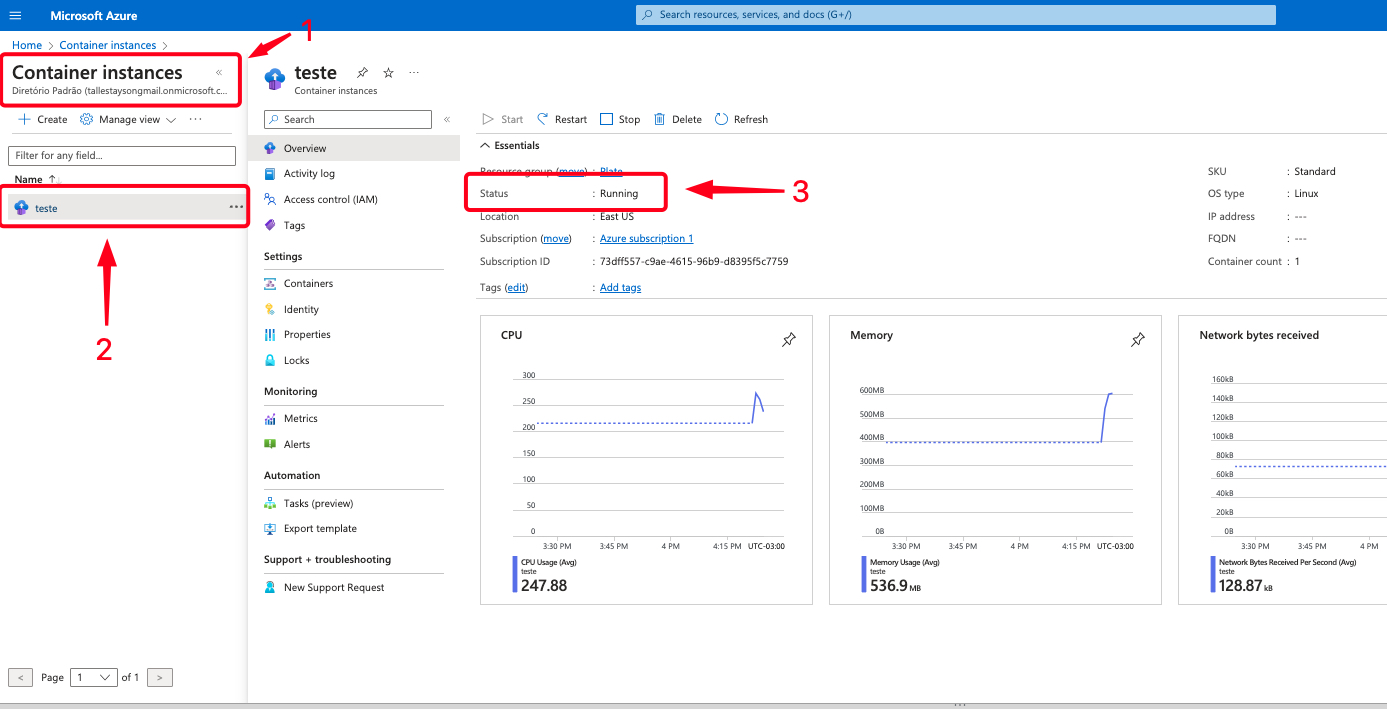
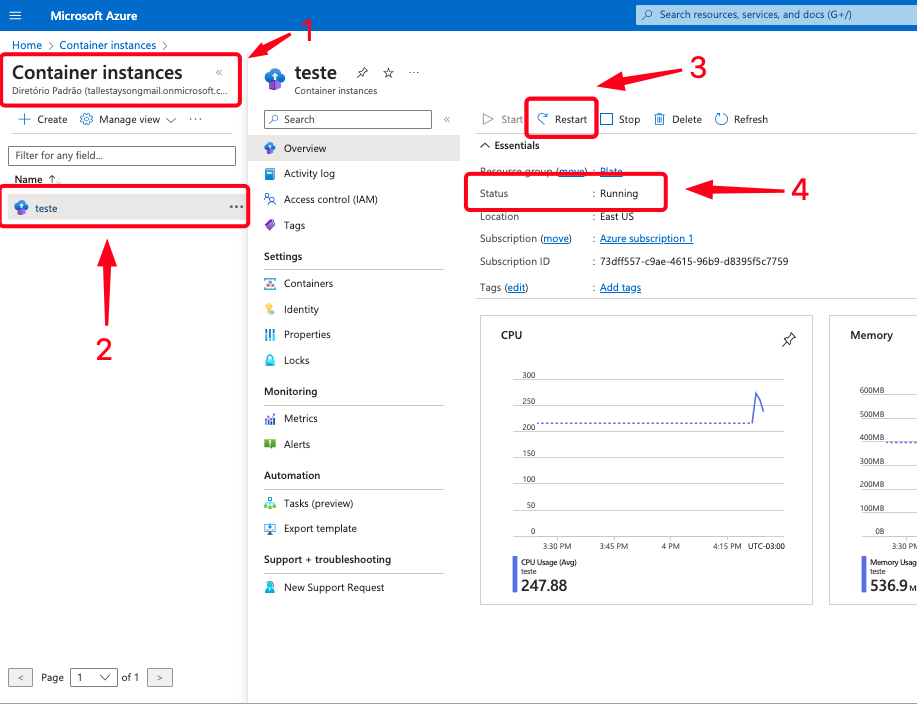
Once you've executed the command, proceed to the following steps to confirm its successful creation and start. The status should read Running, as shown in item 3 of the image.
-
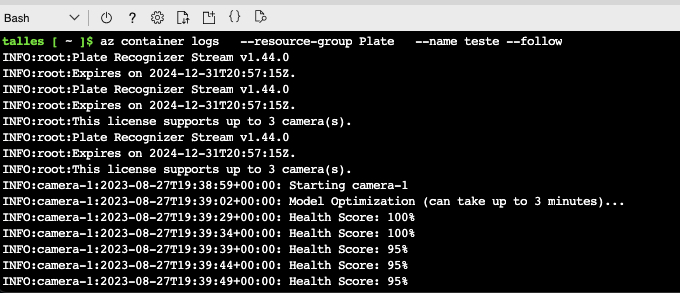
You can check the container's operational behavior by running the following command to see the container logs.
az container logs --resource-group RESOURCE_GROUP --name CONTAINER_NAME --followThe expected output should be similar to the one shown in the following image. The default configuration of the config.ini file points to a demo RTSP URL. The configuration change will be covered in the next step.
 tip
tipThe resource configuration for the container must be checked. The requirement for resources such as CPU and memory will depend on usage, e.g., the number of cameras, RTSP resolution, etc.
-
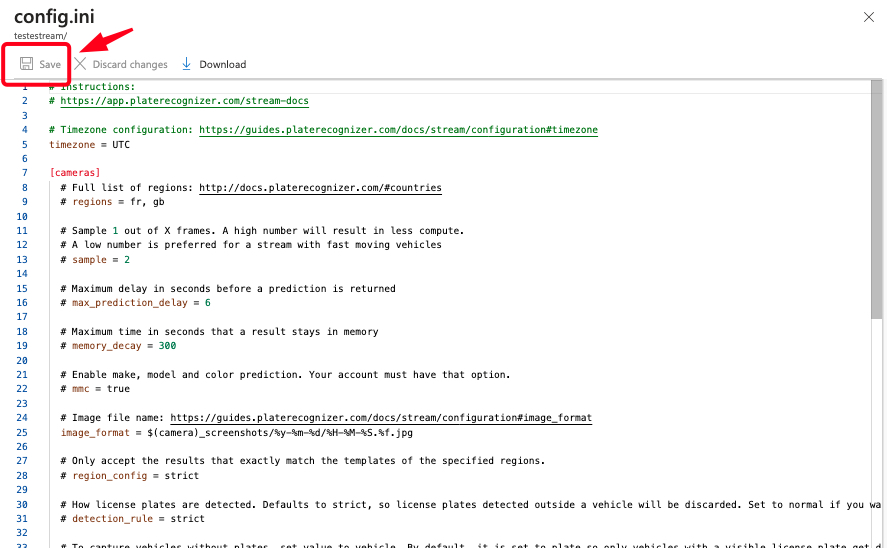
The final step in the configuration flow involves adjusting the config.ini file to match your specific requirements. To accomplish this, log in once again to your Storage account and proceed with the instructions show in the image below:
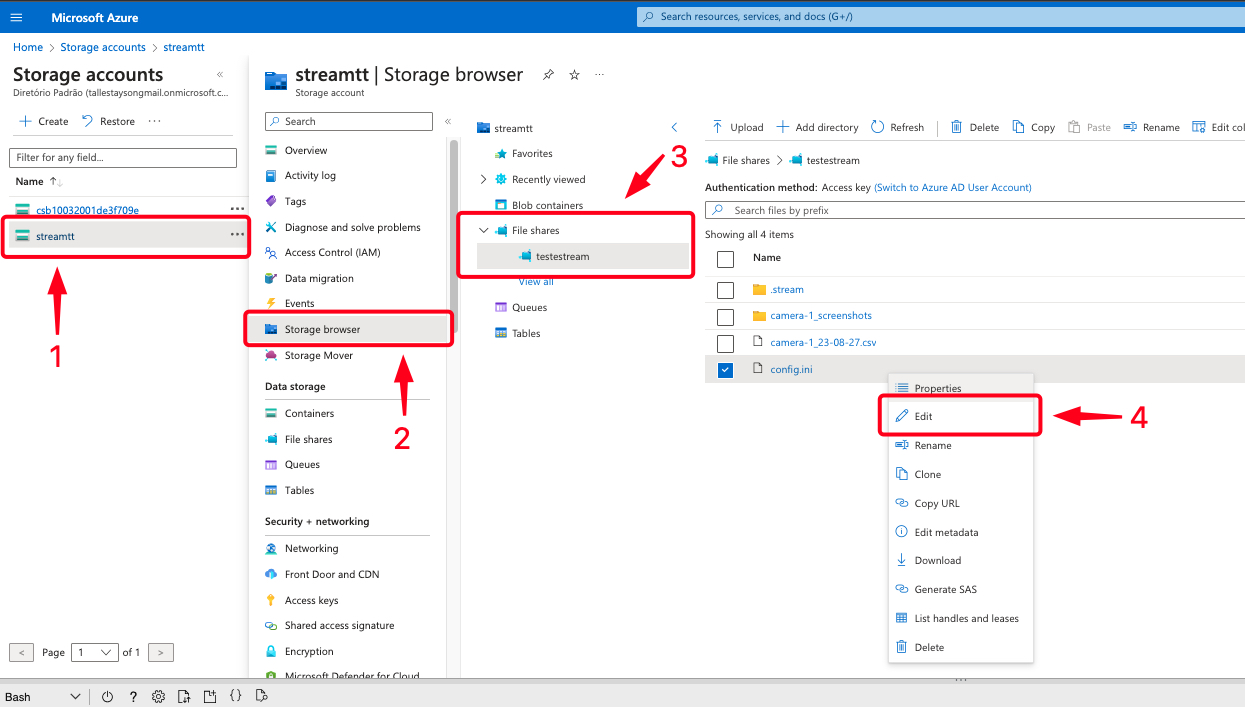
Edit the settings, save the file and restart container instance.
 .
.
These steps are sufficient to deploy the Stream to a container instance in Azure, please note that this deployment performs the basic configuration of a container instance, if you require advanced configuration please check the Azure documentation