Manual Installation Steps
If for some reason, you prefer not to use Plate Recognizer Installer, you can go through the steps below to manually install Stream with Docker.
Prerequisites
Before proceeding further, be aware that there are two essential steps to fulfill in preparation for the setup process.
Install Docker
Install Docker and confirm that it's running.
If you have a Raspberry Pi, please follow this instructions to install docker
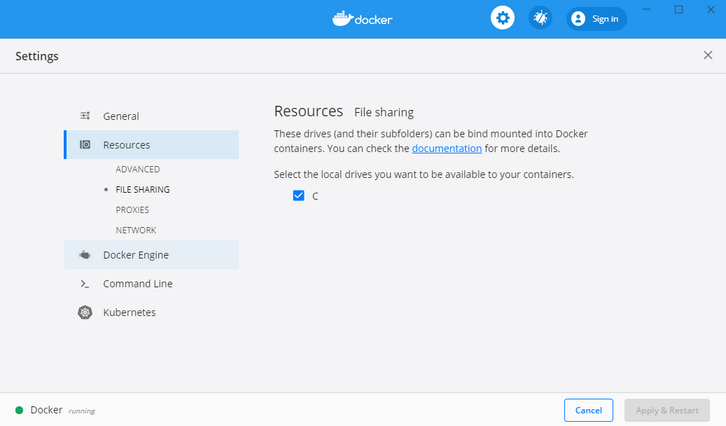
If using Docker Desktop on Windows with the legacy Hyper-V backend and not WSL2, make sure to check this box (next to C) for Resource File Sharing and the click “Apply & Restart”.
Create Stream folder
- Stream uses a single working directory at runtime that should not be ephemeral, it will contains extra configuration files and the processing outputs. It's mostly referred to as the Stream folder
- The directory is specified as a volume mapped to
/user-dataand should be writeable. On your local system, specify a bind mount to make it easy to edit the configuration files. - The directory structure of the Stream folder will be generated the first time you run Stream. The main configuration file(
config.ini) is also created at this time.
Create a Stream folder. For example:
mkdir c:\users\kyt\documents\stream
Installation
The next step involves detailing the procedures for manually installing Stream on various architectures. It is imperative that Docker be installed and operational for this stage.
List of Docker Images
There are Docker images for various architectures and engine customizations for some countries.
Tag structure: platerecognizer/alpr-stream:<country>-<architecture>-<version>
<country>:- leave blank for global engine
thailandgermanykoreajapanegypt
<architecture>:- leave blank for x86
no-avxfor x86 processors without AVX instructions (deprecated since v1.47.0, use x86 image instead)gpufor Nvidia GPU on x86raspberryor ARM based processors. For Apple Silicon M1/M1 Pro useraspberry.jetsonfor Nvidia Jetson with Jetpack r32.jetson-r35for Nvidia Jetson with Jetpack r35.
<version>: leave blank for latest.
To see all the tags, open on our Docker Hub and then click "Tags". Here are a couple of examples:
- Intel x86 (with AVX instructions)
- Global
platerecognizer/alpr-stream - Thailand
platerecognizer/alpr-stream:thailand
- Global
- Raspberry Pi (LattePanda, Orange Pi)
- Global
platerecognizer/alpr-stream:raspberry
- Global
- Nvidia Jetson (with GPU)
- Global
platerecognizer/alpr-stream:jetson - Specific version
platerecognizer/alpr-stream:jetson-1.28.1-r32.6.1
- Global
Docker Command Selector
Use the selector below to generate your Docker command based on country, architecture, and operating system. The parameters for the LICENSE_KEY and TOKEN can be obtained here; enter your Stream Direct License Key for LICENSE_KEY and your API Token for TOKEN.
Update the "Path to Stream config folder" field with the directory in which the "stream" folder was previously created. :::
Checklist
For the following commands:
- Update directory bound to
/user-datato your local directory.-v /path/to/my/folder:/user-data --restart="unless-stopped"is included so Stream automatically restarts(upon system reboot or Docker restart) unless explicitly stopped. This works great when combined with the-doption so Stream runs in the background.
For the commands below, make sure to replace XXXXX with your Stream Direct License Key and YYYYY with your API Token. Get your token and license key.
Installation on Linux
In a terminal, run the following command:
docker pull platerecognizer/alpr-stream
To start the program, use docker run. If you are using Linux (Intel x86):
docker run --restart="unless-stopped" -t --name stream \
  -v /home/kyt/documents/stream:/user-data \
  --user `id -u`:`id -g` \
  -e LICENSE_KEY=XXXXX -e TOKEN=YYYYY \
  platerecognizer/alpr-stream
Having problems? Make sure to read the command selector tips.
You can use the Automatic Stream installation Script.
Installation on Windows
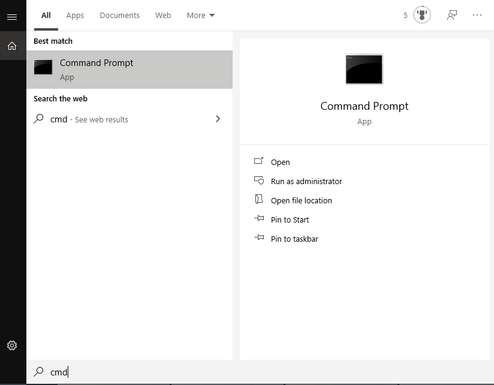
The following steps can be executed in the Command Prompt (cmd) or PowerShell. To open Command Prompt (cmd) or PowerShell:
Press Win + R to open the Run dialog.
Type "cmd" for Command Prompt or "PowerShell" for PowerShell and press Enter.
Alternatively, you can search for "cmd" or "PowerShell" in the Start menu and select the corresponding application.
In Command Prompt or PowerShell, run the following command:
docker pull platerecognizer/alpr-stream
- CMD
- Linux Console over Windows
  #run stream using CMD
  docker run --restart="unless-stopped" -t --name stream  ^
    -v c:\users\kyt\documents\stream:/user-data ^
    -e LICENSE_KEY=XXXXX -e TOKEN=YYYYY ^
    platerecognizer/alpr-stream
  #run stream using Linux Console over Windows
  docker run --restart="unless-stopped" -t --name stream \
    -v c:\users\kyt\documents\stream:/user-data \
    -e LICENSE_KEY=XXXXX -e TOKEN=YYYYY \
    platerecognizer/alpr-stream
Having problems? Make sure to read the command selector tips.
Installation on Nvidia Jetson
Need some help? See our Jetson FAQ for technical questions and advanced configuration options.
When starting the container for the first time, it performs model optimizations that can last 5 to 10 minutes. Subsequent runs are fast.
In Command Prompt, run the following command.
docker pull platerecognizer/alpr-stream:jetson
If you are using a Jetson device, make sure to include --runtime nvidia --group-add video. The latest images are built for Jetpacks 4.6.1 and 5.1.1, using Stream with another Jetpack version may trigger errors. Otherwise, you can use older images.
docker run --restart="unless-stopped" --runtime nvidia -t --name stream \
  -v /home/kyt/documents/stream:/user-data --privileged \
  --group-add video --user `id -u`:`id -g` \
  -e LICENSE_KEY=XXXXX -e TOKEN=YYYYY \
  platerecognizer/alpr-stream:jetson
Having problems? Make sure to read the command selector tips.
Installation on Raspberry Pi
In Command Prompt, run the following command.
docker pull platerecognizer/alpr-stream:raspberry
docker run --restart="unless-stopped" -t --name stream \
  -v /home/kyt/documents/stream:/user-data --privileged \
  --group-add video --user `id -u`:`id -g` \
  -e LICENSE_KEY=XXXXX -e TOKEN=YYYYY \
  platerecognizer/alpr-stream:raspberry
Having problems? Make sure to read the command selector tips.
You can use the Automatic Stream installation Script.
Installation with Desktop GPU (Nvidia Only)
Make sure you have installed the right Nvidia drivers and have Nvidia-docker installed. Tested with drivers version 525.
Pull the gpu docker image:
docker pull platerecognizer/alpr-stream:gpu
Run the container with one of the following commands:
Option 1 (new version of nvidia-docker), notice the --gpus all:
docker run --restart="unless-stopped" -t --name stream \
  --gpus all \
  -v /home/kyt/documents/stream:/user-data \
  --user `id -u`:`id -g` \
  -e LICENSE_KEY=XXXXX -e TOKEN=YYYYY \
  platerecognizer/alpr-stream:gpu
Option 2 (Deprecated nvidia-docker2 version):
docker run --restart="unless-stopped" -t --name stream \
  --runtime nvidia \
  -v /home/kyt/documents/stream:/user-data \
  --user `id -u`:`id -g` \
  -e LICENSE_KEY=XXXXX -e TOKEN=YYYYY \
  platerecognizer/alpr-stream:gpu
Having problems? Make sure to read the command selector tips.
Installation Using the Automatic Script
The provided shell script stream.sh is tailored to facilitate the seamless setup and operation of an on-premise Stream on your system. This script dynamically verifies the presence of Docker and installs it if it is not already available.
Subsequently, the script orchestrates the configuration and launch of Stream, incorporating defaults. By default, it designates the script execution location as the foundational directory, creating a dedicated "stream" folder to house default configuration files and the outputs of the Stream.
Prerequisites
- Administrator permissions or membership in the docker group.
- Supported system architectures: Linux Debian or Ubuntu (x86_64), Raspberry pi (armv7l, aarch64, armv7hf).
The Docker container instantiated by the script is denoted as "stream" and is configured to restart automatically unless intentionally halted. Additionally, the Stream is set up to commence automatically upon system boot, ensuring a seamless and persistent integration into your system environment.
Docker Image
The script pulls the Plate Recognizer Stream Docker image based on your system's architecture.
- x86_64 architecture: platerecognizer/alpr-stream
- ARM architectures (armv7l, aarch64, armv7hf): platerecognizer/alpr-stream:raspberry Running the Stream
Usage
Run the script with the following parameters:
./stream.sh [-t=YOUR_API_TOKEN] [-l=YOUR_LICENSE_KEY]
Parameters:
-t, --token- API Token.-l, --license_key- Stream Direct License Key.
If the parameters are not provided, the script will interactively prompt you to enter the token and license key.
Unique command:
Use the following command to download and run the script in one step. It facilitates the automation of installations in larger scripts or automated environments, such as virtual machine provisioning or containerized environments.
bash -c "$(curl -fsSL https://raw.githubusercontent.com/parkpow/deep-license-plate-recognition/master/docker/install_script/stream.sh)" -- -t=YOUR_API_TOKEN -l=YOUR_LICENSE_KEY
Example Usage:
bash ./stream.sh
bash ./stream.sh -t=YYYYYYYYYYYYY -l=XXXXXXXXXXXXXXX
bash -c "$(curl -fsSL https://raw.githubusercontent.com/parkpow/deep-license-plate-recognition/master/docker/install_script/stream.sh)" -- -t=YYYYYYYYYYYYYYYYYYYYYYYYYYYYY -l=XXXXXXXXXX
First Run
- The first time you start Stream, a
config.inifile is created in your Stream folder. - Now edit
config.iniand change theurlfield. This can either be a video or an RTSP camera.
Check how to update the configurations.
Expected Output
When you run the command, you should get an output similar to this:
INFO:root:Plate Recognizer Stream v1.27.0
INFO:root:Loading detection zones.
INFO:root:Expires on 2022-01-07T06:55:00Z.
INFO:root:This license supports up to 20 camera(s).
INFO:camera-1:2021-09-02T18:10:07+00:00: Starting Camera One
INFO:camera-1:2021-09-02T18:10:13+00:00: Model Optimization (can take up to 3 minutes)...
INFO:camera-1:2021-09-02T18:10:13+00:00: Health Score: 100%
When Stream runs, You will see:
- Images in camera-1_screenshots
- By default, the prediction results are saved in a CSV file in your Stream folder. You may use other formats.
- The FPS refers to the frames per second that your machine is processing the video or camera feed. Example: INFO:camera-1:2021-08-23: Health Score: 100%
- There’s no need to worry if Stream is showing 4-6 FPS for situations where vehicles are driving fairly slow, such as 20-35 mph.
