ParkPow On-premises Setup Guide
This guide describes how to install ParkPow in your own environment so that you do not need to send ALPR data to our hosted ParkPow solution.
Installation
Step 1: Install Docker and Docker Compose
Install Docker and Docker Compose
Step 2: Download docker-compose.yml
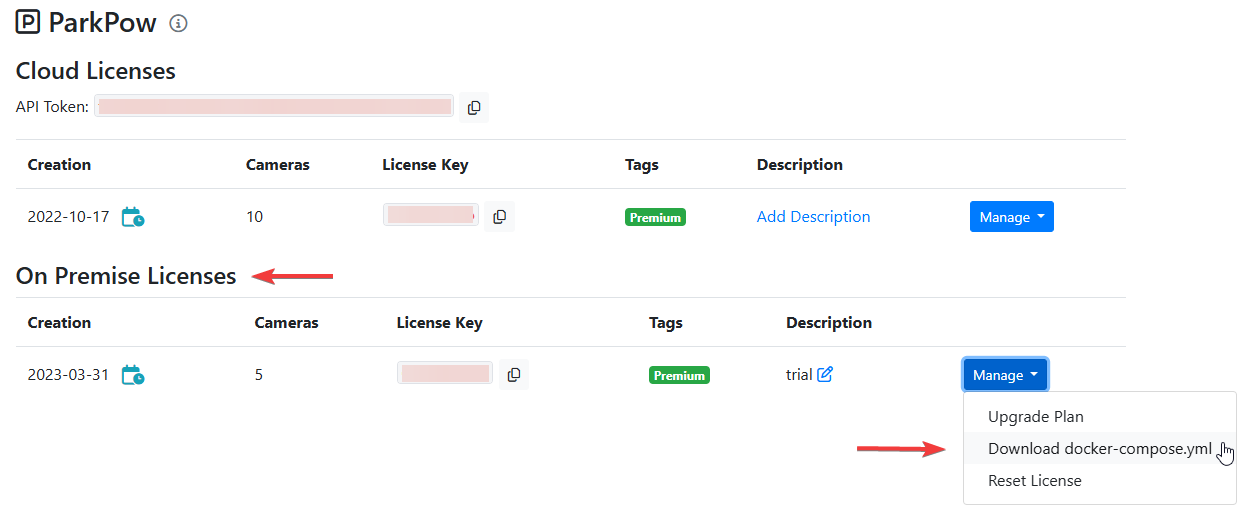
Log in to Plate Recognizer and then go to your Account Page. Under the ParkPow License section, click on Manage (blue button) and download docker-compose.yml. This file defines the services used by ParkPow and contains your license information.
Step 3: Run docker-compose.yml
Open your command prompt (cmd for Windows) or terminal (for macOS and Linux), go to your download folder, and type the command:
docker compose pull
docker compose up
If you are running ParkPow on a server with a public IP address, consider setting up a reverse proxy to expose ParkPow on port 443 (HTTPS) for better security. Please refer to this guide for more details.
All Docker commands shown in this documentation do not include sudo.
On Linux systems, it may be necessary to prefix Docker commands with sudo.
See How to run Docker without sudo on Linux? if you'd like to avoid using sudo.
ParkPow Web server may take 2-5 minutes to be ready, due to database patches. It is crucial to wait and not terminate the containers.
If you try to access the web interface before the database updates complete, you may encounter errors, such as 502 Bad Gateway. This is normal behavior during the containers startup process.
Step 4: Access On-premises ParkPow
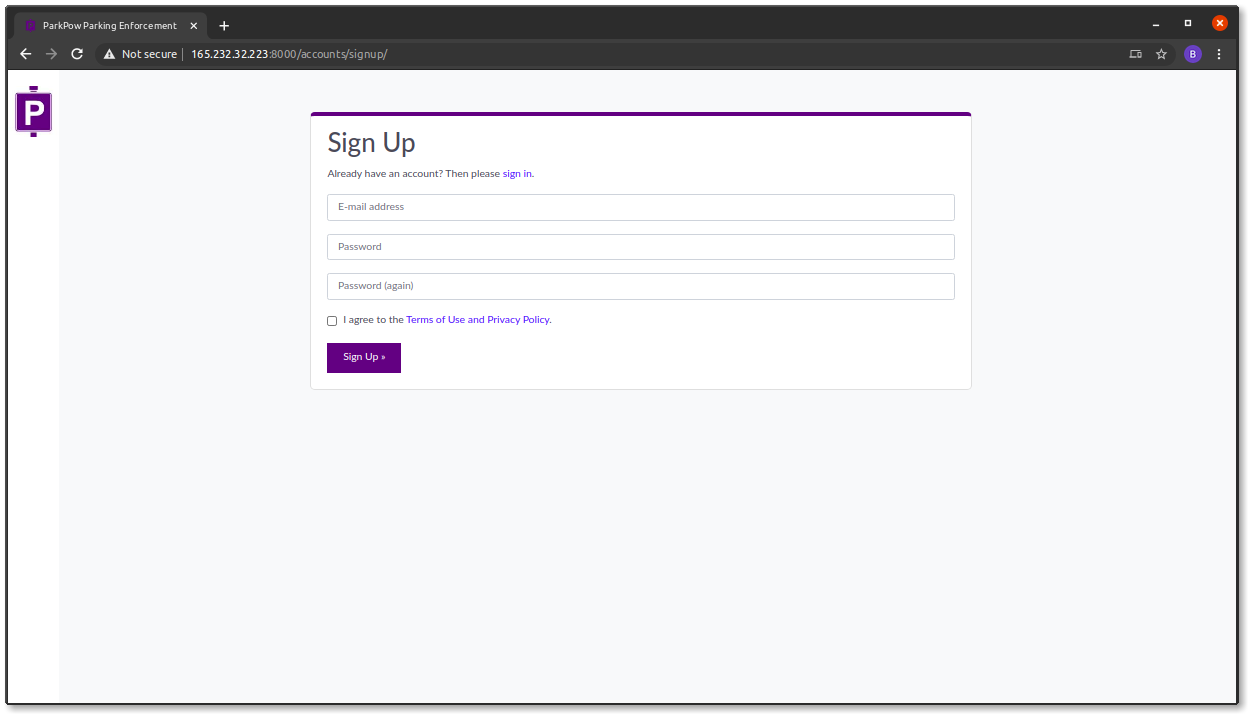
You can now access the ParkPow Dashboard at: http://local-or-public-IP:8000/
You can create an email and password login for this On-premises ParkPow. Please note that this login is only to access this local instance of ParkPow on-premises. This login does not necessarily need to be the same as your Plate Recognizer account or your online ParkPow account.
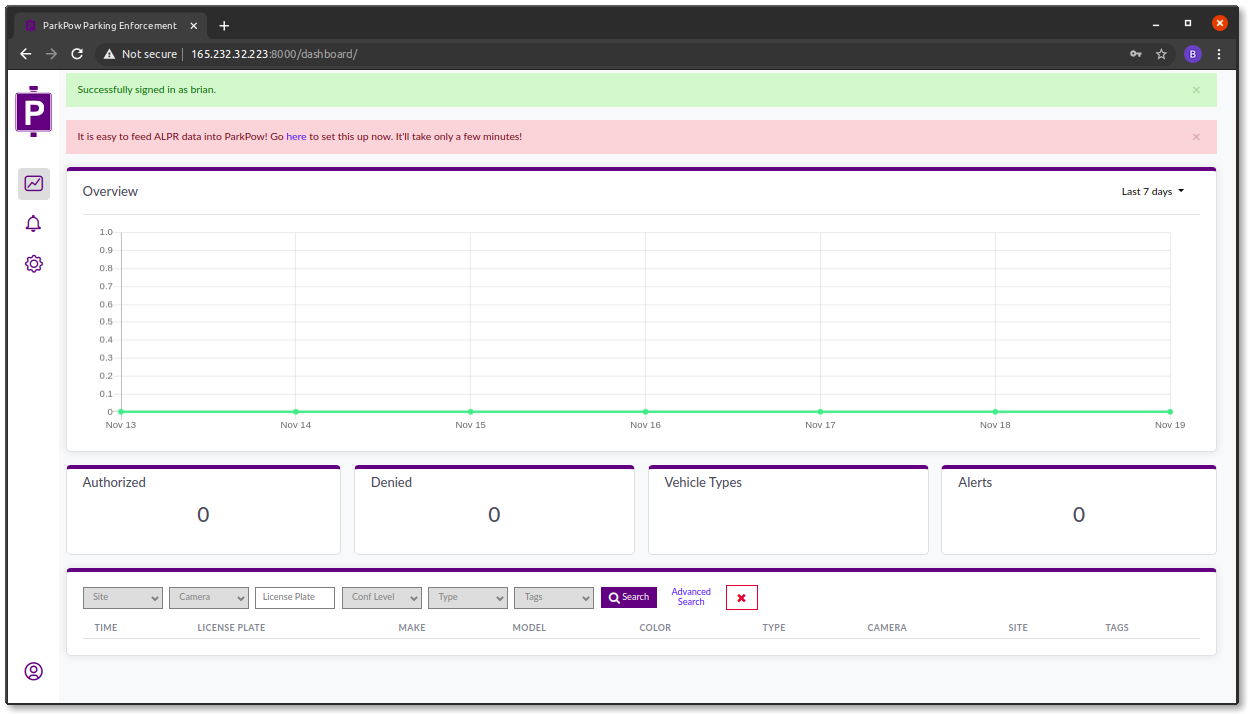
After you create the login, you will have access to the dashboard.
Step 5: Send ALPR Info to On-premises ParkPow
Now that you have ParkPow set up on your local machine, you can forward ALPR data from Stream, Snapshot, or another ALPR solution over to ParkPow.
Follow the steps here to feed ALPR data into this on-premises version of ParkPow.
You're done!
Changing Configuration (docker-compose.yml)
You can edit the docker-compose.yml file, even while ParkPow on-premises instance is running, such as the license key, exposed ports, etc. Once you have made the necessary changes, restart the services by executing docker compose up -d --force-recreate.
All the data is stored in Docker volumes, so updating the docker-compose.yml file and restarting the services will not result in any data loss.
- For added security, it's recommended to back up your database before making any changes.
- You can also mount to a local folder to have direct access to the database files.
Uninstalling, Moving On-premises ParkPow
The ParkPow On-premises instance can be deployed on a single machine. If you wish to move the On-premises ParkPow to a different machine, you will first have to uninstall it from the original machine and then install it on the new machine. Follow the steps below to uninstall On-premises ParkPow.
Step 1: Uninstall License
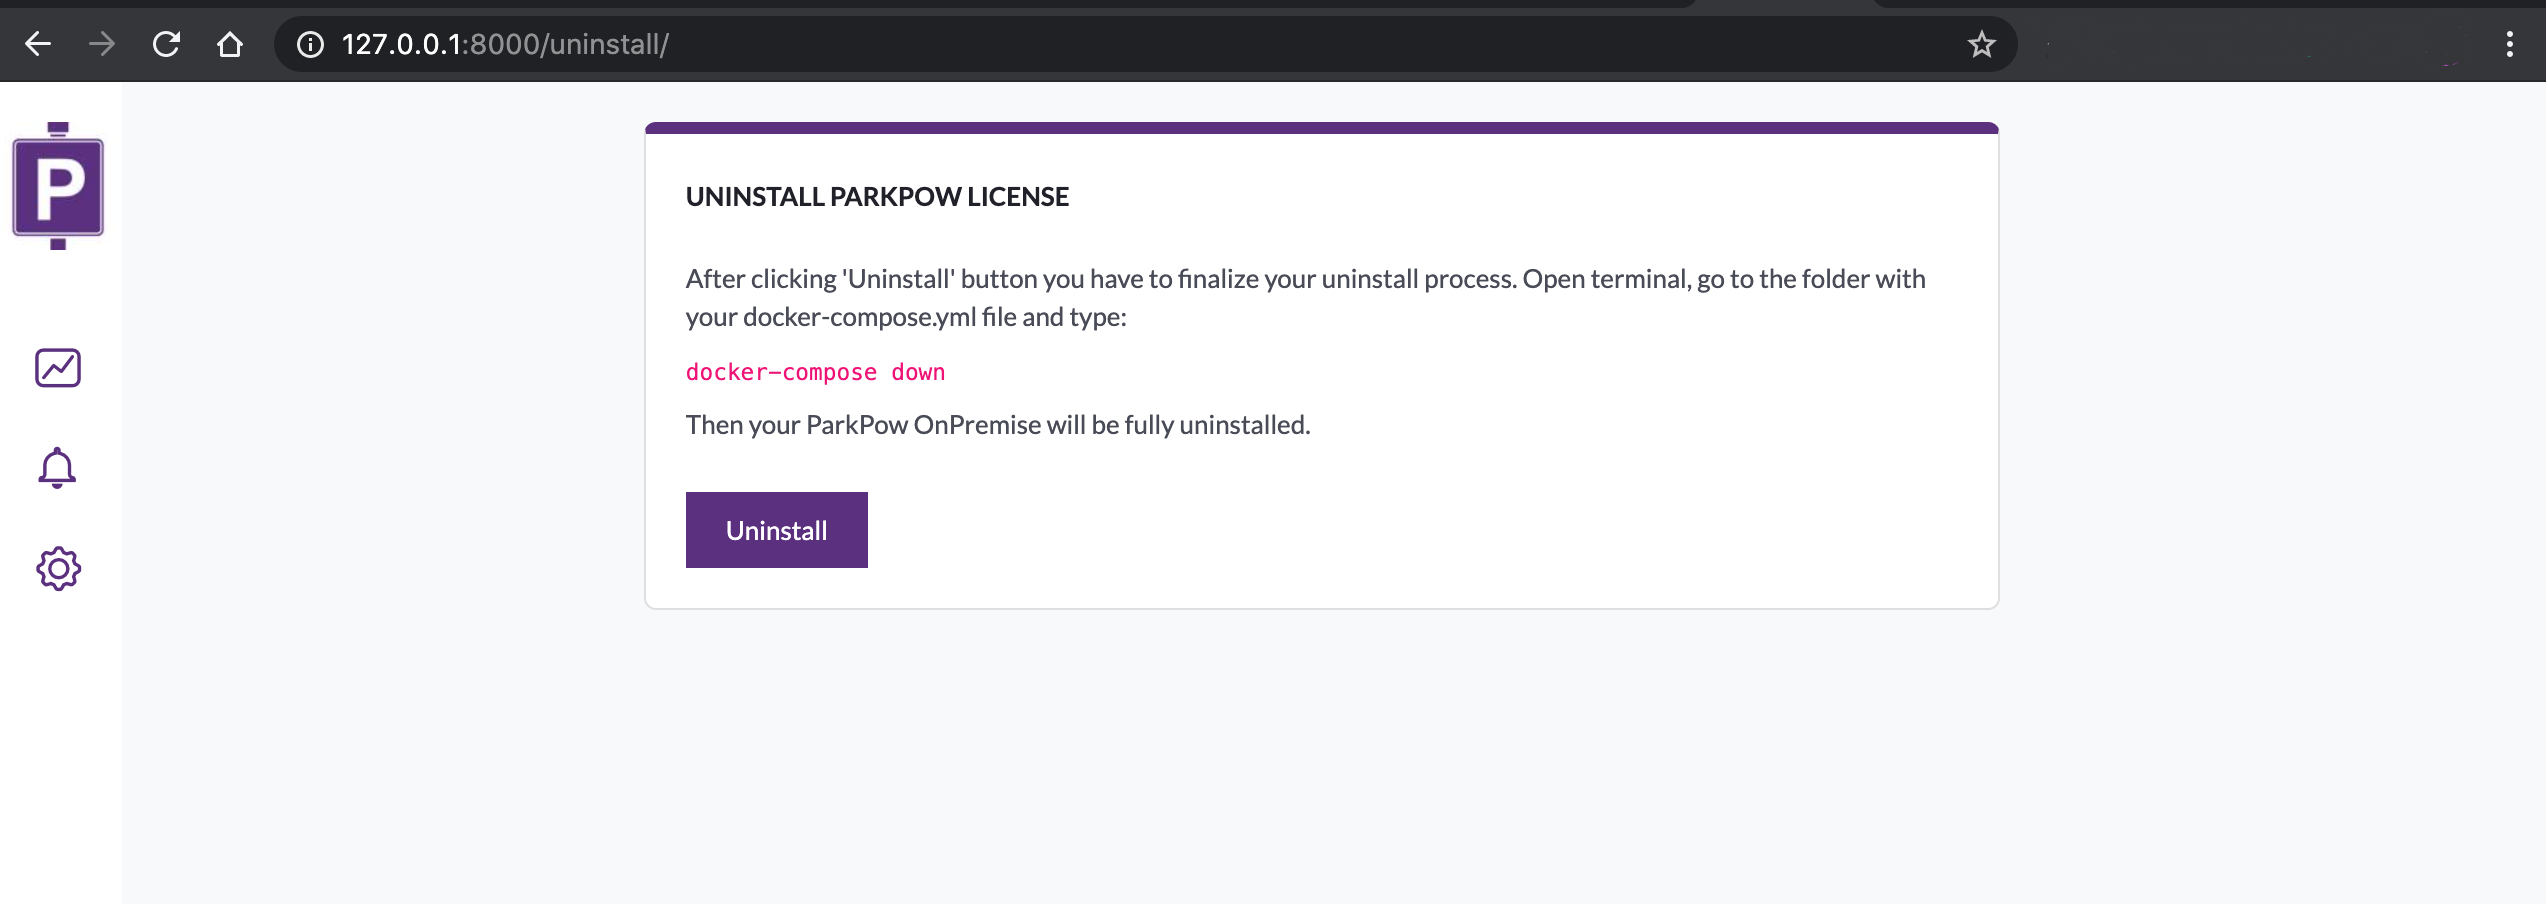
Go to http://local-or-public-IP:8000/uninstall/ and click the 'Uninstall' button.
You will be redirected to https://parkpow.com/uninstallation to finalize your uninstallation.
Step 2: Finalize Uninstall
To finalize uninstallation, open terminal, go to the folder with your docker-compose.yml file, and type:
docker compose down
Don't run docker compose down before Step 1, because your ParkPow license will be considered as installed.
If you do, you will see an error like this in the logs:
web-1          | "It is not possible to install this ParkPow license on more than 1 machine. First, you have to uninstall: https://guides.platerecognizer.com/docs/parkpow/on-premise Are you unable to uninstall? You can use this reset form https://api.platerecognizer.com/service/parkpow/3776/reset/"
web-1          | Traceback (most recent call last):
web-1          |   ...
web-1          | requests.exceptions.HTTPError: 400 Client Error: Bad Request for url: https://api.platerecognizer.com/v1/parkpow/license/?code=AKntSXYsSn&hash=fed333909dbe420535cf3f9aff384591f6e8ef96eacba365a49f79e4ee3f780f&version=2025.10.09.1309
In such case, please go to Plate Recognizer > ParkPow > Settings, click on Manage for the on-premise ParkPow License being uninstalled, and then click on Reset License.
Upgrading to the Latest Version
It's highly recommended to backup your database before upgrading to prevent data loss in case of upgrade issues.
Step 1: Backup Database (Recommended)
Before upgrading, create a database backup using the following command:
This command is available only from version 2022.05.22.093330 onwards.
docker compose exec -u0 web python manage.pyc dbbackup
The backup file will be retained in the db_backup volume even after container restarts. Running as root is necessary, as db_backup is owned by root, but ParkPow (the web service) runs as a non-root user. You can access it by running:
docker compose exec -u0 web ls /app/backups
In order to get the backup files from the container to your host machine, you can use a command like this:
docker compose cp web:/app/backups /path/to/your/host/backup_folder
If you mount /app/backups to a local folder, you can access the backup files directly from the host machine without needing to copy them out of the container.
Step 2: Perform the Upgrade
- Open your command prompt (cmd for Windows) or terminal (for macOS and Linux).
- Go to the folder where the
docker-compose.ymlis located. For example,cd /path/to/parkpow. - Type this command:
docker compose pull
docker compose up -d --force-recreate
If the IP address is going to be different than the first-time install, then you should uninstall the app and follow the install from step 2 again. This should help avoid consuming a license for the old IP address.
Restoring Database Backup
If you encounter issues after upgrading and need to restore your database backup:
This command is available only from version 2022.05.22.093330 onwards.
# Run next command only if you have not mounted /app/backups to a local folder
docker compose cp /path/to/your/host/backup_folder web:/app/backups # Copy backup files to the container
docker compose exec -u0 web python manage.pyc dbrestore