Parking Spot Tags
ParkPow Spotter lets you monitor vehicles in specific parking spots, rather than parking lots. Some sample use cases:
- Hospital: Make sure that the parking spots allocated for physicians are not taken by other non-physician vehicles.
- Retail: Make sure that vehicles in the visitor spots are there for a maximum of 1 hour.
- Gated Community: Make sure that non-tenants are not parking in the tenant spots.
In order for ParkPow Spotter to work, you will need a dedicated camera to focus on 3-4 specific parking spots. This camera should send an image every 1-5 minutes to Snapshot Cloud or SDK. You can forward the ALPR results from Snapshot Cloud or SDK over to ParkPow.
Make sure to identify that camera as a Spot Camera in the Entrance/Exit field of your Camera Settings.
Follow the steps below to set up ParkPow Spotter:
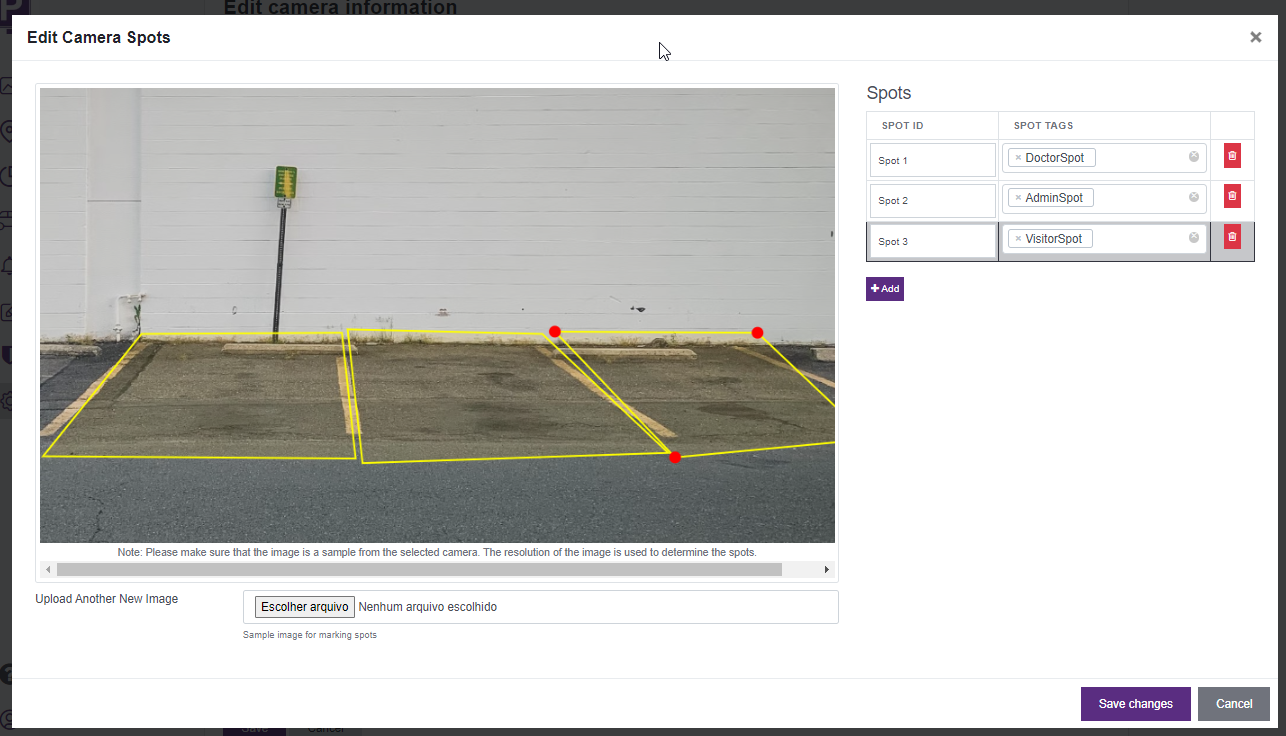
- Go to Settings > Parking Spot Tag and create Spot Tags that will refer to your parking spots. Examples of Spot Tags include "Tenant Spot", and "Visitor Spot".
- With the created Spot Tags, edit the camera and select the Spot Camera setting. In this setting, you can indicate the number of parking spots.
- Click Edit and add a screenshot of that camera. Draw a polygon to determine the area for each Parking Spot. Click Save when done.