Sites
This page lists all the sites in your account. For each site, you can see its configuration at a glance and, from the Actions column, update its occupancy, edit it, or delete it.
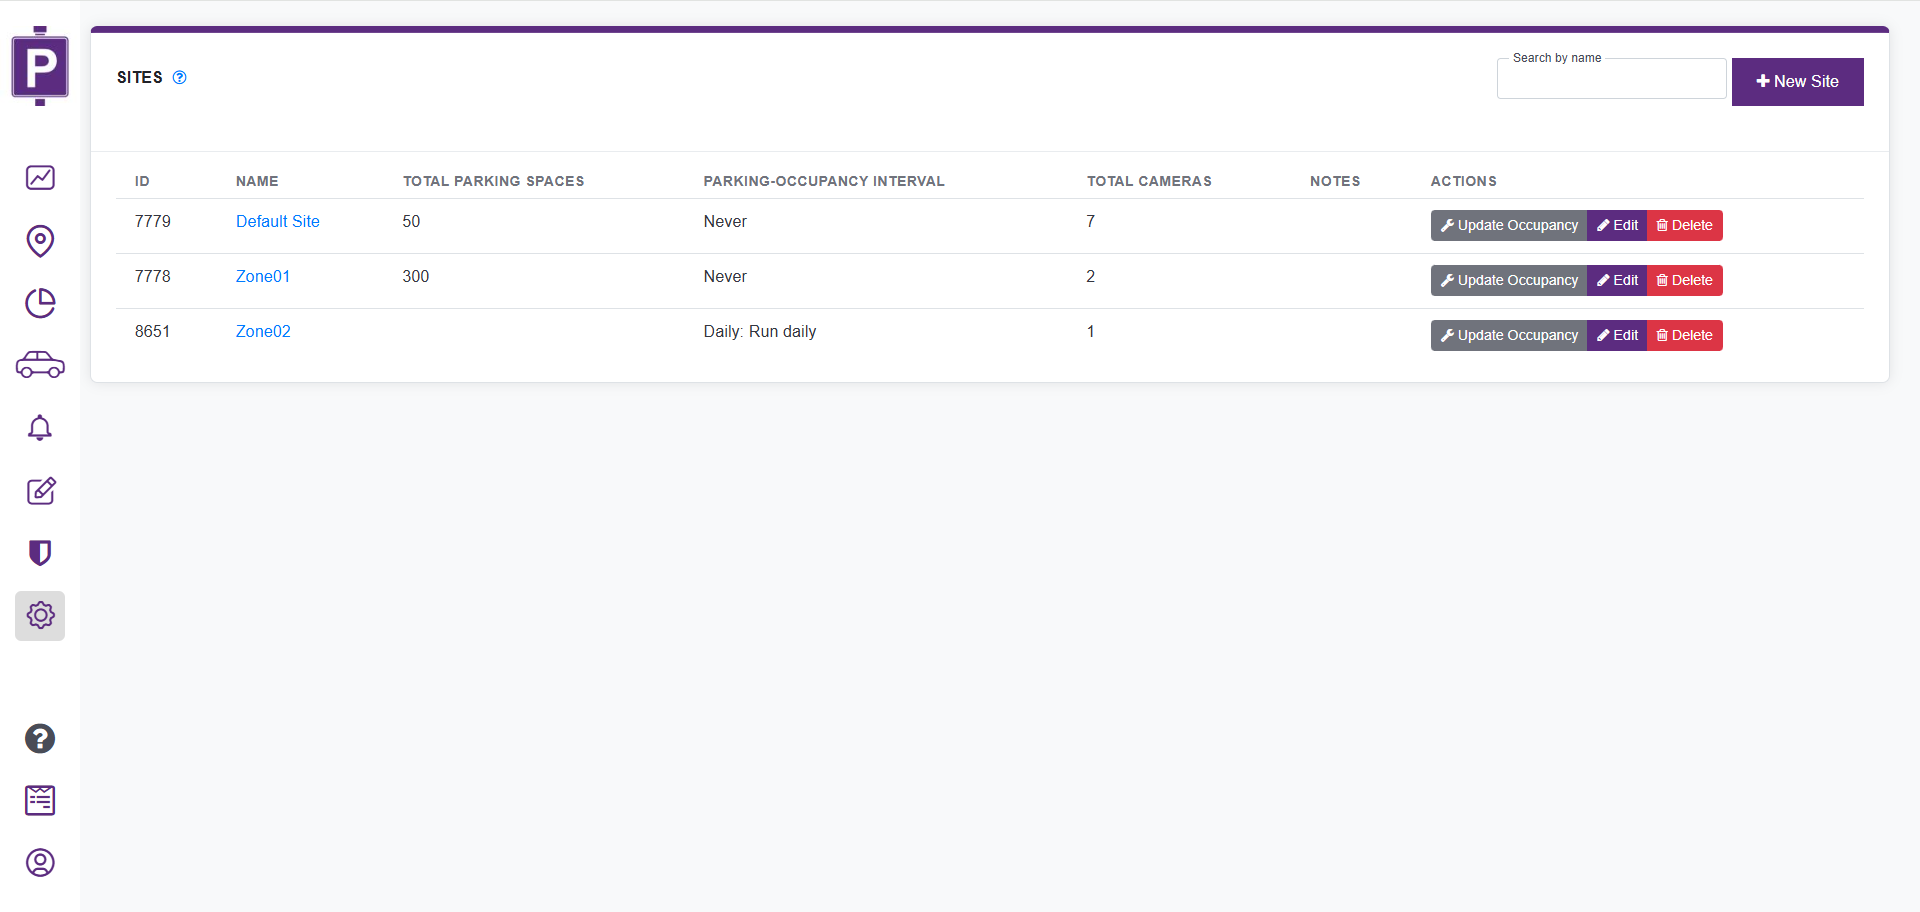
| Column | Description |
|---|---|
| ID | The site's unique identifier. |
| Name | The site's name. |
| Total Parking Spaces | Total number of available parking spaces on the site (see Total Parking Spaces below). |
| Parking-Occupancy Interval | The site's current Parking Occupancy Reset schedule (see Parking Occupancy Reset below). Defaults to Never. |
| Total Cameras | Number of cameras assigned to the site. |
| Notes | Free-text notes about the site, if any. |
| Actions | Update Occupancy, Edit, and Delete buttons for the site (see Actions below). |
Actions
Each site row provides three actions:
Update Occupancy (manual, one-off correction)
Parking Occupancy is calculated from camera entry/exit visits, so counts can drift from the real occupancy over time (missed reads, tailgating, vehicles moved manually, etc.). Use Update Occupancy when you notice, at a given moment, that the count is off and want to fix it right away — a single, punctual correction rather than a recurring routine.
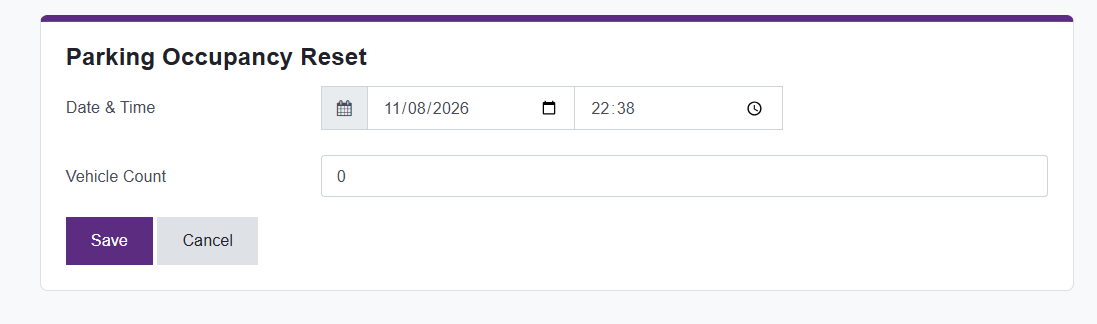
Click Update Occupancy for the site you want to correct. This opens the Parking Occupancy Reset form, where you set:
- Date & Time: when the correction should be applied.
- Vehicle Count: the correct occupancy value to set at that date and time.
Unlike the recurring Parking Occupancy Reset schedule configured on the site itself, this is a one-time, single-execution correction — it runs once, for the value and time you specify, and does not repeat.
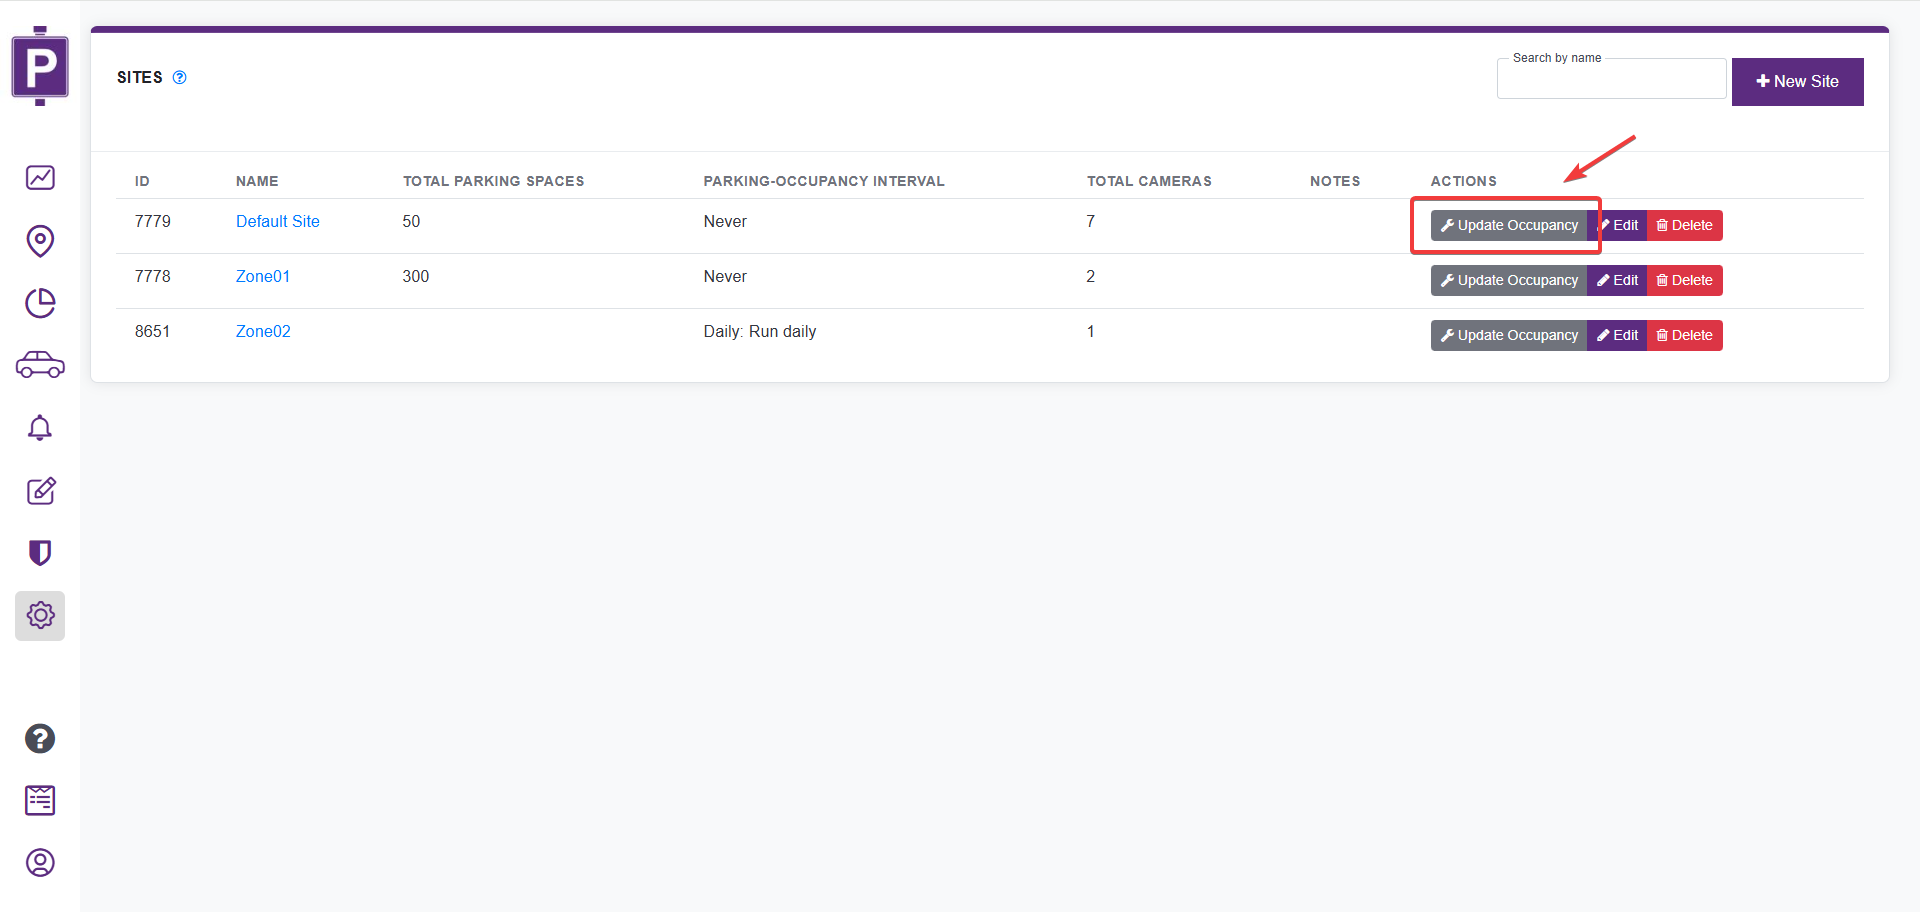
Only Owners and Admins can use the Update Occupancy button. See Roles.
Example use case: An operator notices the dashboard shows 48/50 spaces occupied, but a physical check of the lot shows only 40 cars — a few exits weren't read by the camera. Instead of waiting for the next scheduled reset, an Admin clicks Update Occupancy and sets Vehicle Count to 40 for the current Date & Time, correcting the count immediately.
Edit
Opens the site's edit page, where you can update its configuration — see Creating and Editing a Site below.
Delete
Permanently removes the site.
Creating and Editing a Site
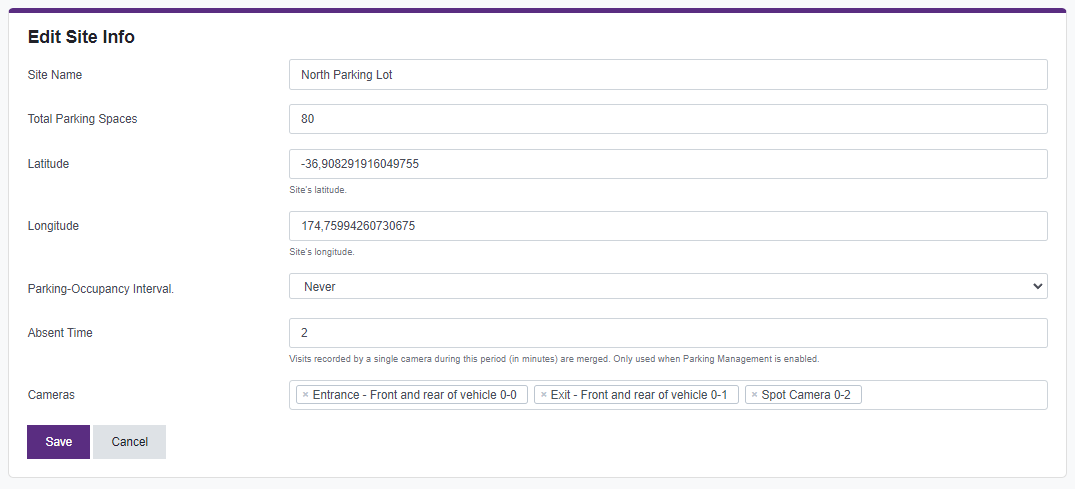
Click New Site to create a new site, or Edit on an existing site's row, to configure it.
Sites can be created to represent different locations, in which you add cameras that are present in that area. Site examples:
- North Parking Lot: Contains the North Entrance Camera and the North Exit Camera.
- Main Street Site: Contains the Main 1st Street Camera, Main 2nd Street Camera and Main 3rd Street Camera.
You can view the visits of a camera across different sites, but for this, you need to redirect the visits from camera X to camera Y in Parkpow. This way, both cameras can be located on separate sites. For more information, see the link.
Total Parking Spaces
Represents the total number of available parking spaces on the site. This parameter is used to calculate parking occupancy percentages displayed on the dashboard.
Parking Occupancy Reset (scheduled, recurring)
Use this to keep occupancy accurate on an ongoing basis, without needing anyone to remember to correct it manually — the count is automatically reset on a schedule you define.
Set the Parking Occupancy Reset field to automatically reset the occupancy count on a recurring schedule:
- Never (default) — occupancy is never automatically reset.
- Daily: Run daily
- Weekly: On each Sunday
- Monthly: On first day of a month
- Quarterly: One every third month
Selecting any option other than Never reveals a Reset Time field, where you set the time of day the reset should run.
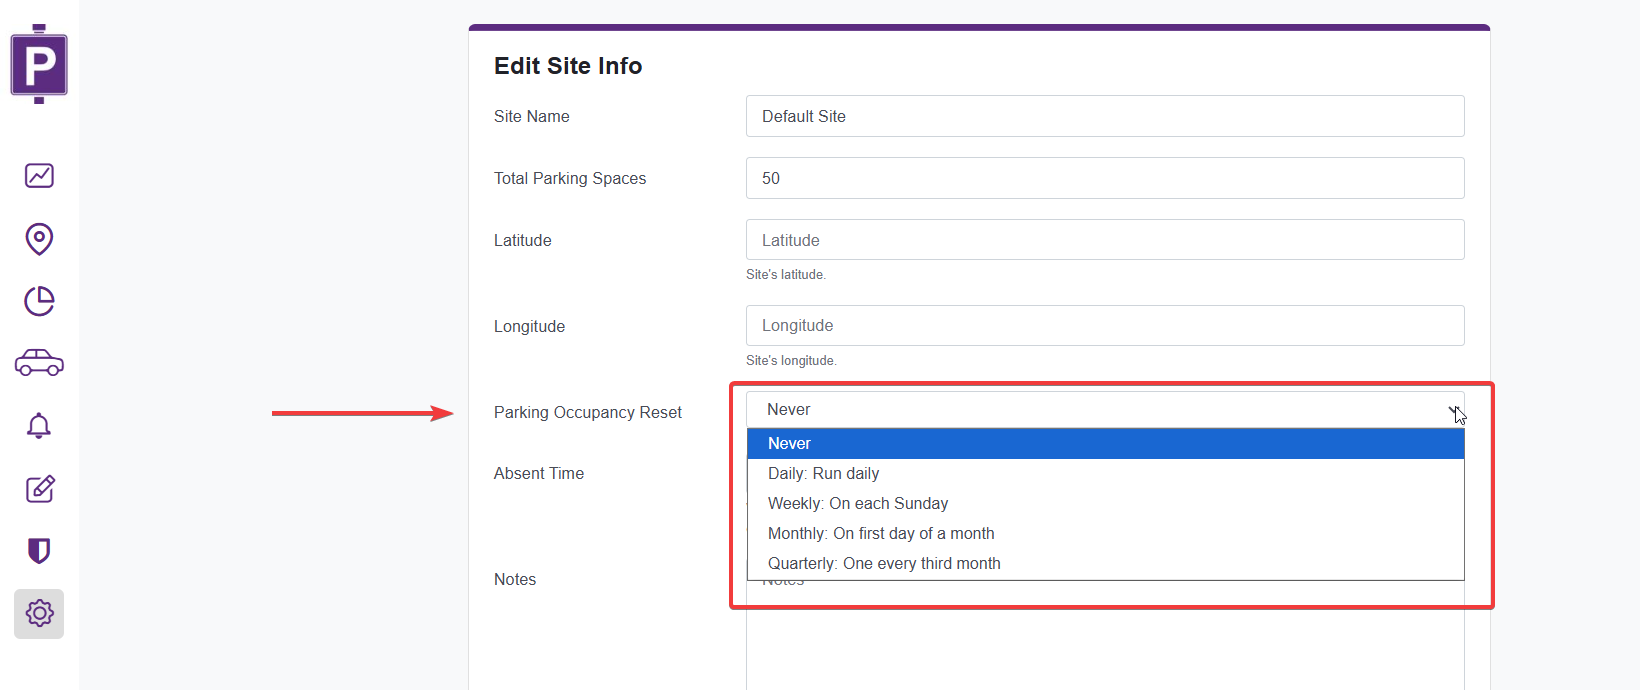
Only Owners and Admins can configure the Parking Occupancy Reset schedule. See Roles.
Example use case: A parking lot is known to empty out completely every night. Instead of manually fixing small drift every day, the Admin sets Parking Occupancy Reset to Daily: Run daily with a Reset Time of 4:00 AM, so the count is automatically zeroed out overnight without any manual work.
Absent Time
When your account is set to parking management (see above), you can configure Absent Time. It is used to decide how to create a new visit. During the absent time period (in minutes), multiple visits from the same vehicle will be merged into just one. For example, given an absent time of 5 minutes, and a vehicle with license plate 12345, if we record 2 visits at 10:00 and 10:02, we will save a single visit with time 10:00. The goal of this parameter is to prevent having duplicate visits for vehicles that move slowly (stuck in traffic or waiting in parking).